
Designing a Spacer for my AxiDraw Plotter
I have an AxiDraw V3/A3 Penplotter that I bought to satisfy a desire to own such a fantastic machine. It started in my teen years working with HP Plotters in our university lab at the TUHH. I could not afford an HP Plotter back in the day, so that desire was never satisfied.
Jumping forward to today: I bought the AxiDraw Plotter in the Summer of 2021, and I ordered the Magnetic Easel. That was all a good decision. It’s a fun tool, and I enjoy working with it. There was only one shortcoming that didn’t make me happy: the Magnetic Easel is not attached to the Plotter.
If I wanted to print something in multiple passes with different colors, I had to ensure that nothing moved while changing the pen. Otherwise, there would be an annoying offset. Long story short: I needed something to keep the distance constant between the Easel and the Plotter.
I could have used Legos, Wood, or some other material, but I thought it was an excellent exercise to create a piece that fits the whole setup much better and can be printed on my 3D Printer.
Design a Spacer
I took some measurements of the Plotter and the Easel and created a simple sketch that I could use to create a proper model. I planned to design something that I could print with my 3D Printer.
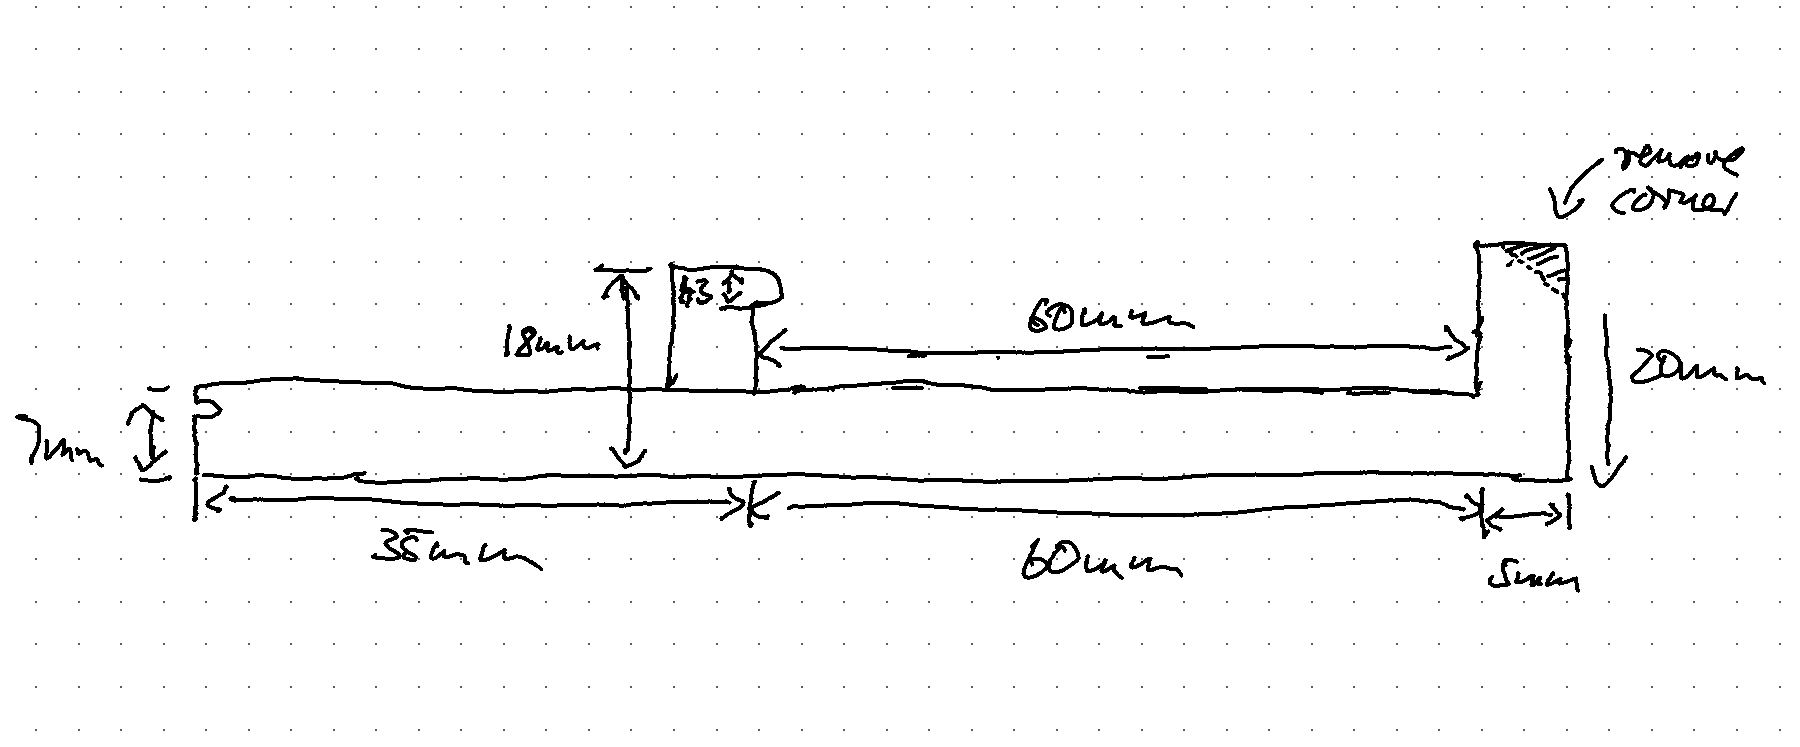
Shot Details
That was enough information to get started on the design. Since I don’t know how to use CAD software correctly, but I know how to write code, I settled for OpenSCAD to create the model.
Programming OpenSCAD
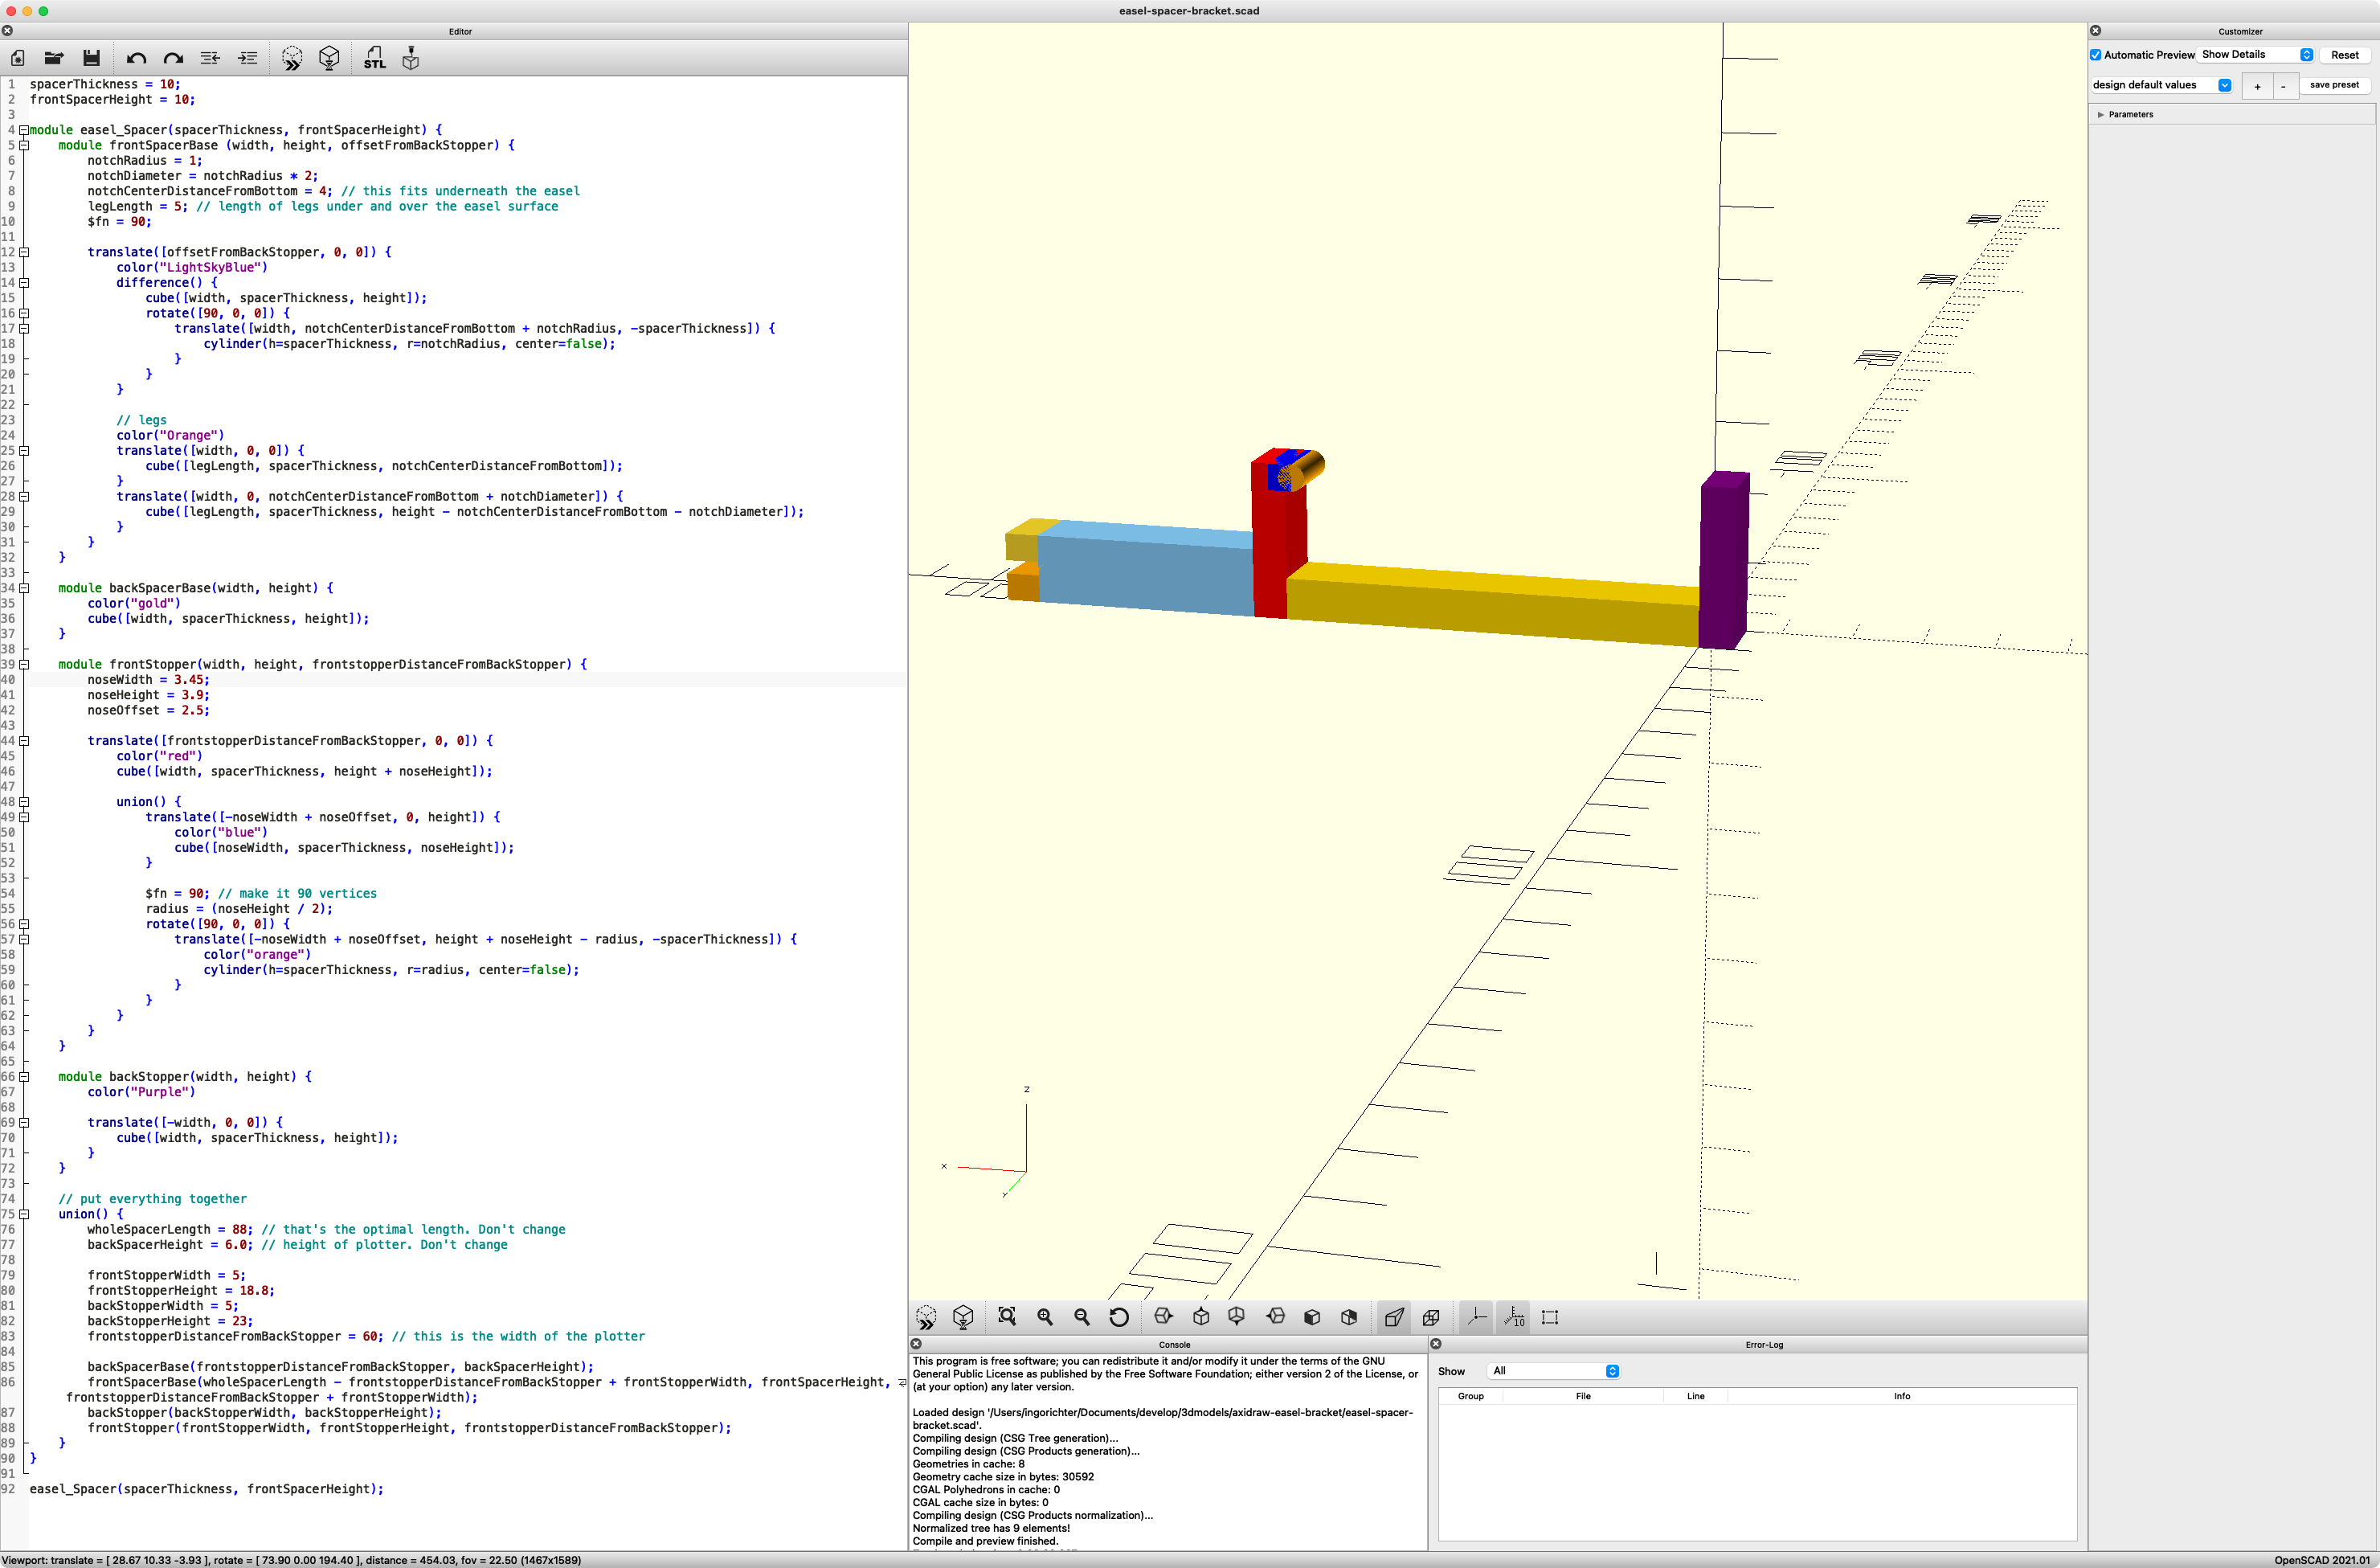
Creating a model in OpenSCAD is something anybody can learn. I like that you can parameterize your models and make adjustments in code. The code is under version control, and I have a good history of what I changed and why. I believe that there is excellent CAD software out in the world that might provide the same features without writing code to design a model.
The image below shows the program and the rendered model. There are some similarities between the initial sketch and the rendered model :-)
Shot Details
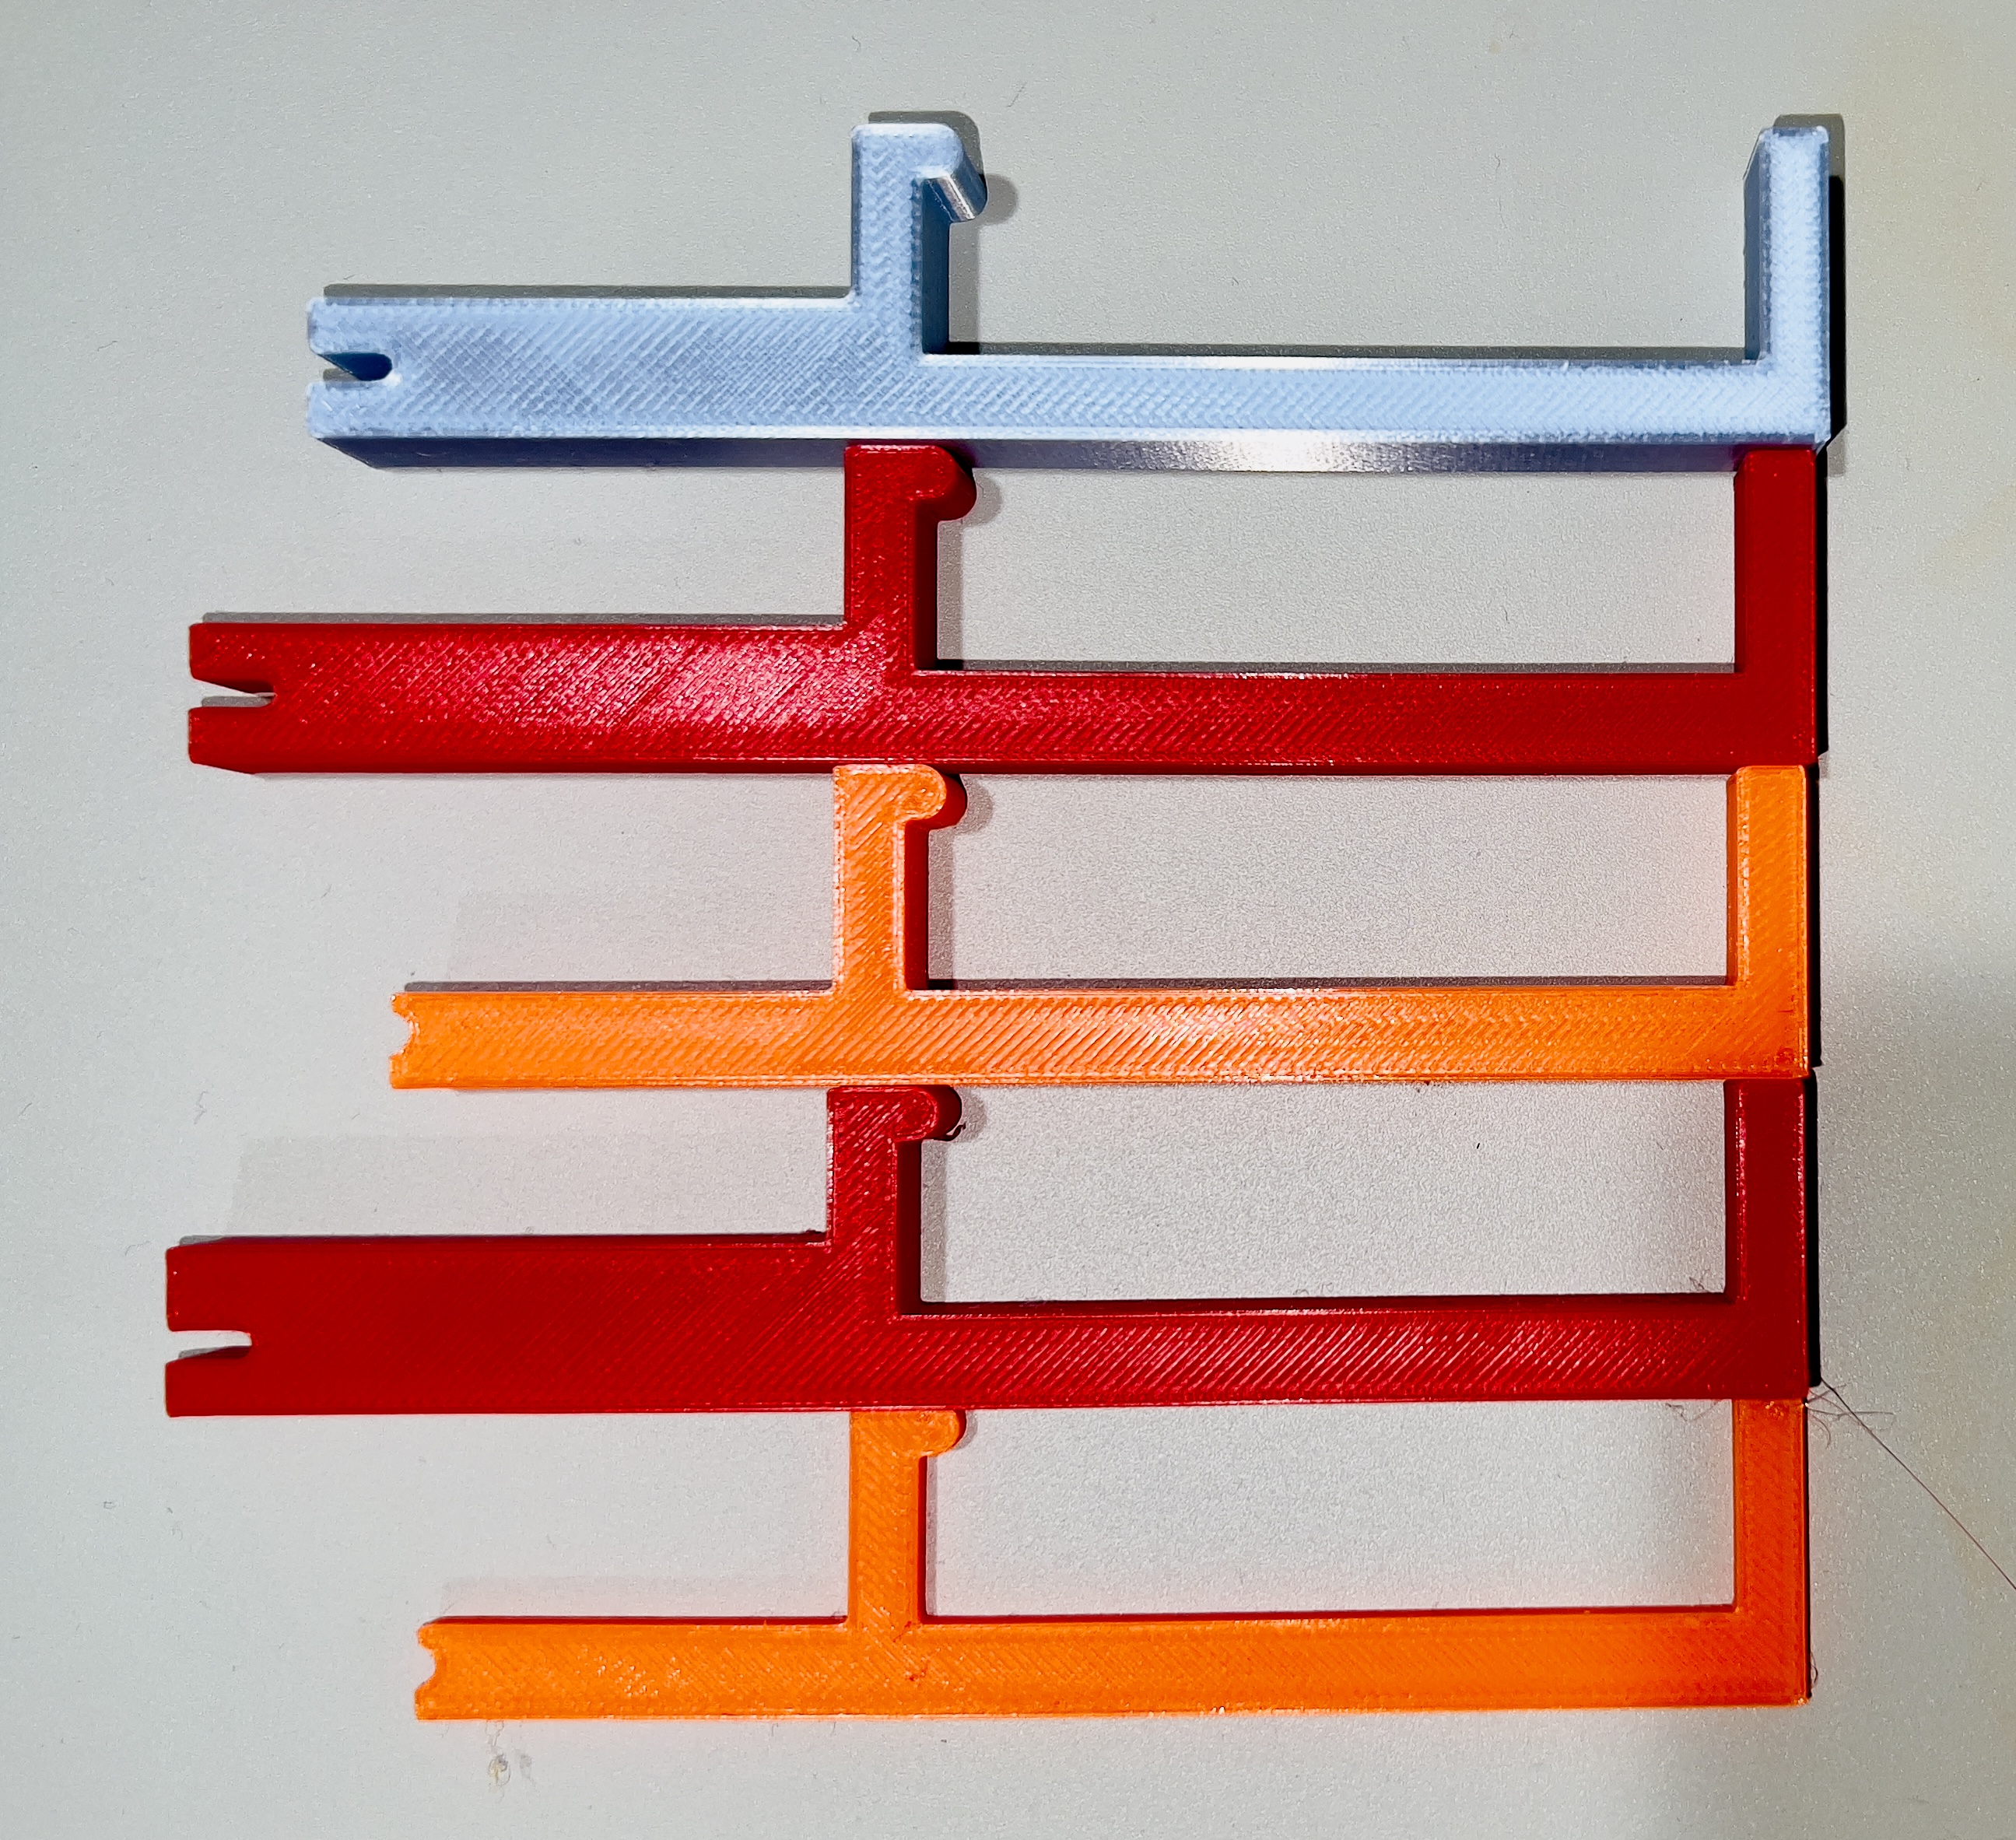
I have to admit that the creation took more time than I anticipated. One reason is that I had to learn how to express certain parts of the design in code, e.g., the frontStopper module. How to combine the different geometric shapes and the boolean operations to achieve what I wanted. The other reason that it took longer was that I didn’t do my initial measurements precisely enough 🤦♂️
I had to iterate on the design, as you can see in the screenshot below. That meant printing the model on the 3D Printer and seeing if it fits.
Shot Details
- Date: April 05, 2022
- Aperture: 1.50
- Brightness: 51251/10698
- Exposure Time: 1/76
- F Number: 3/2
- Focal Length: 2988413/524283
- ISO: 32
- Lens Model: iPhone 13 Pro Max back triple camera 5.7mm f/1.5
You can see the different modifications I made along the way. Sometimes subtle, sometimes bolder.
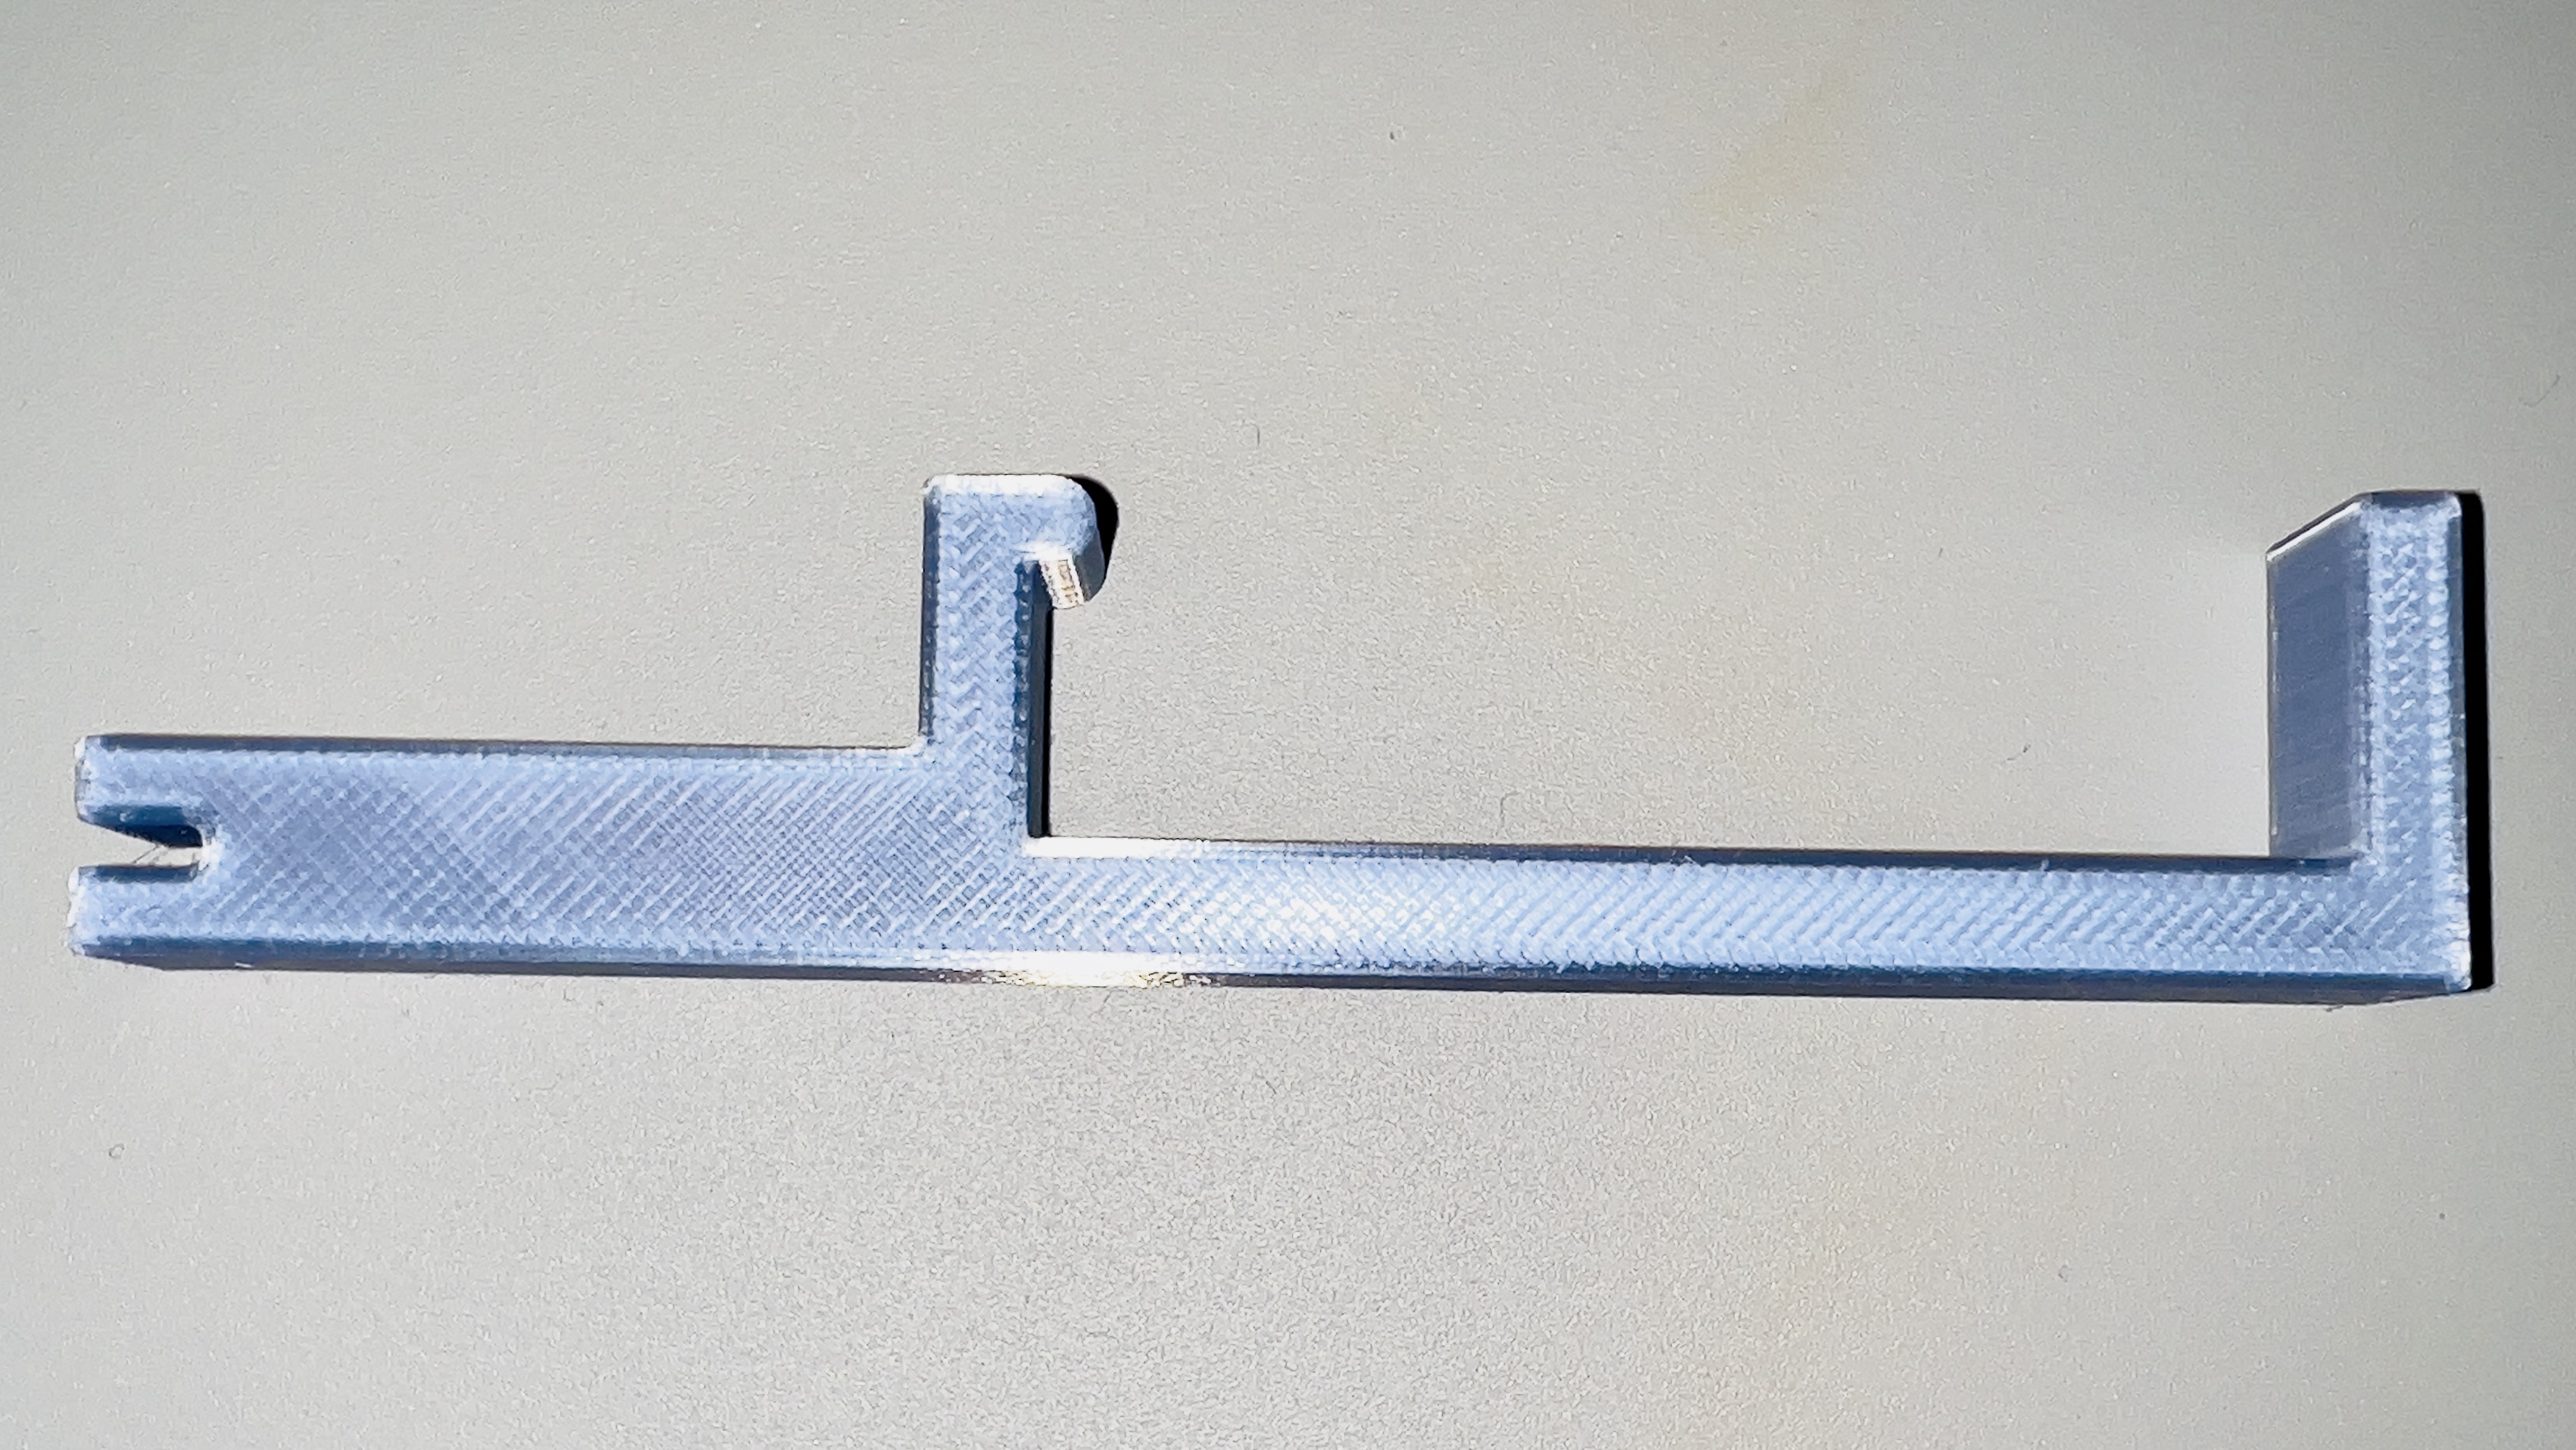
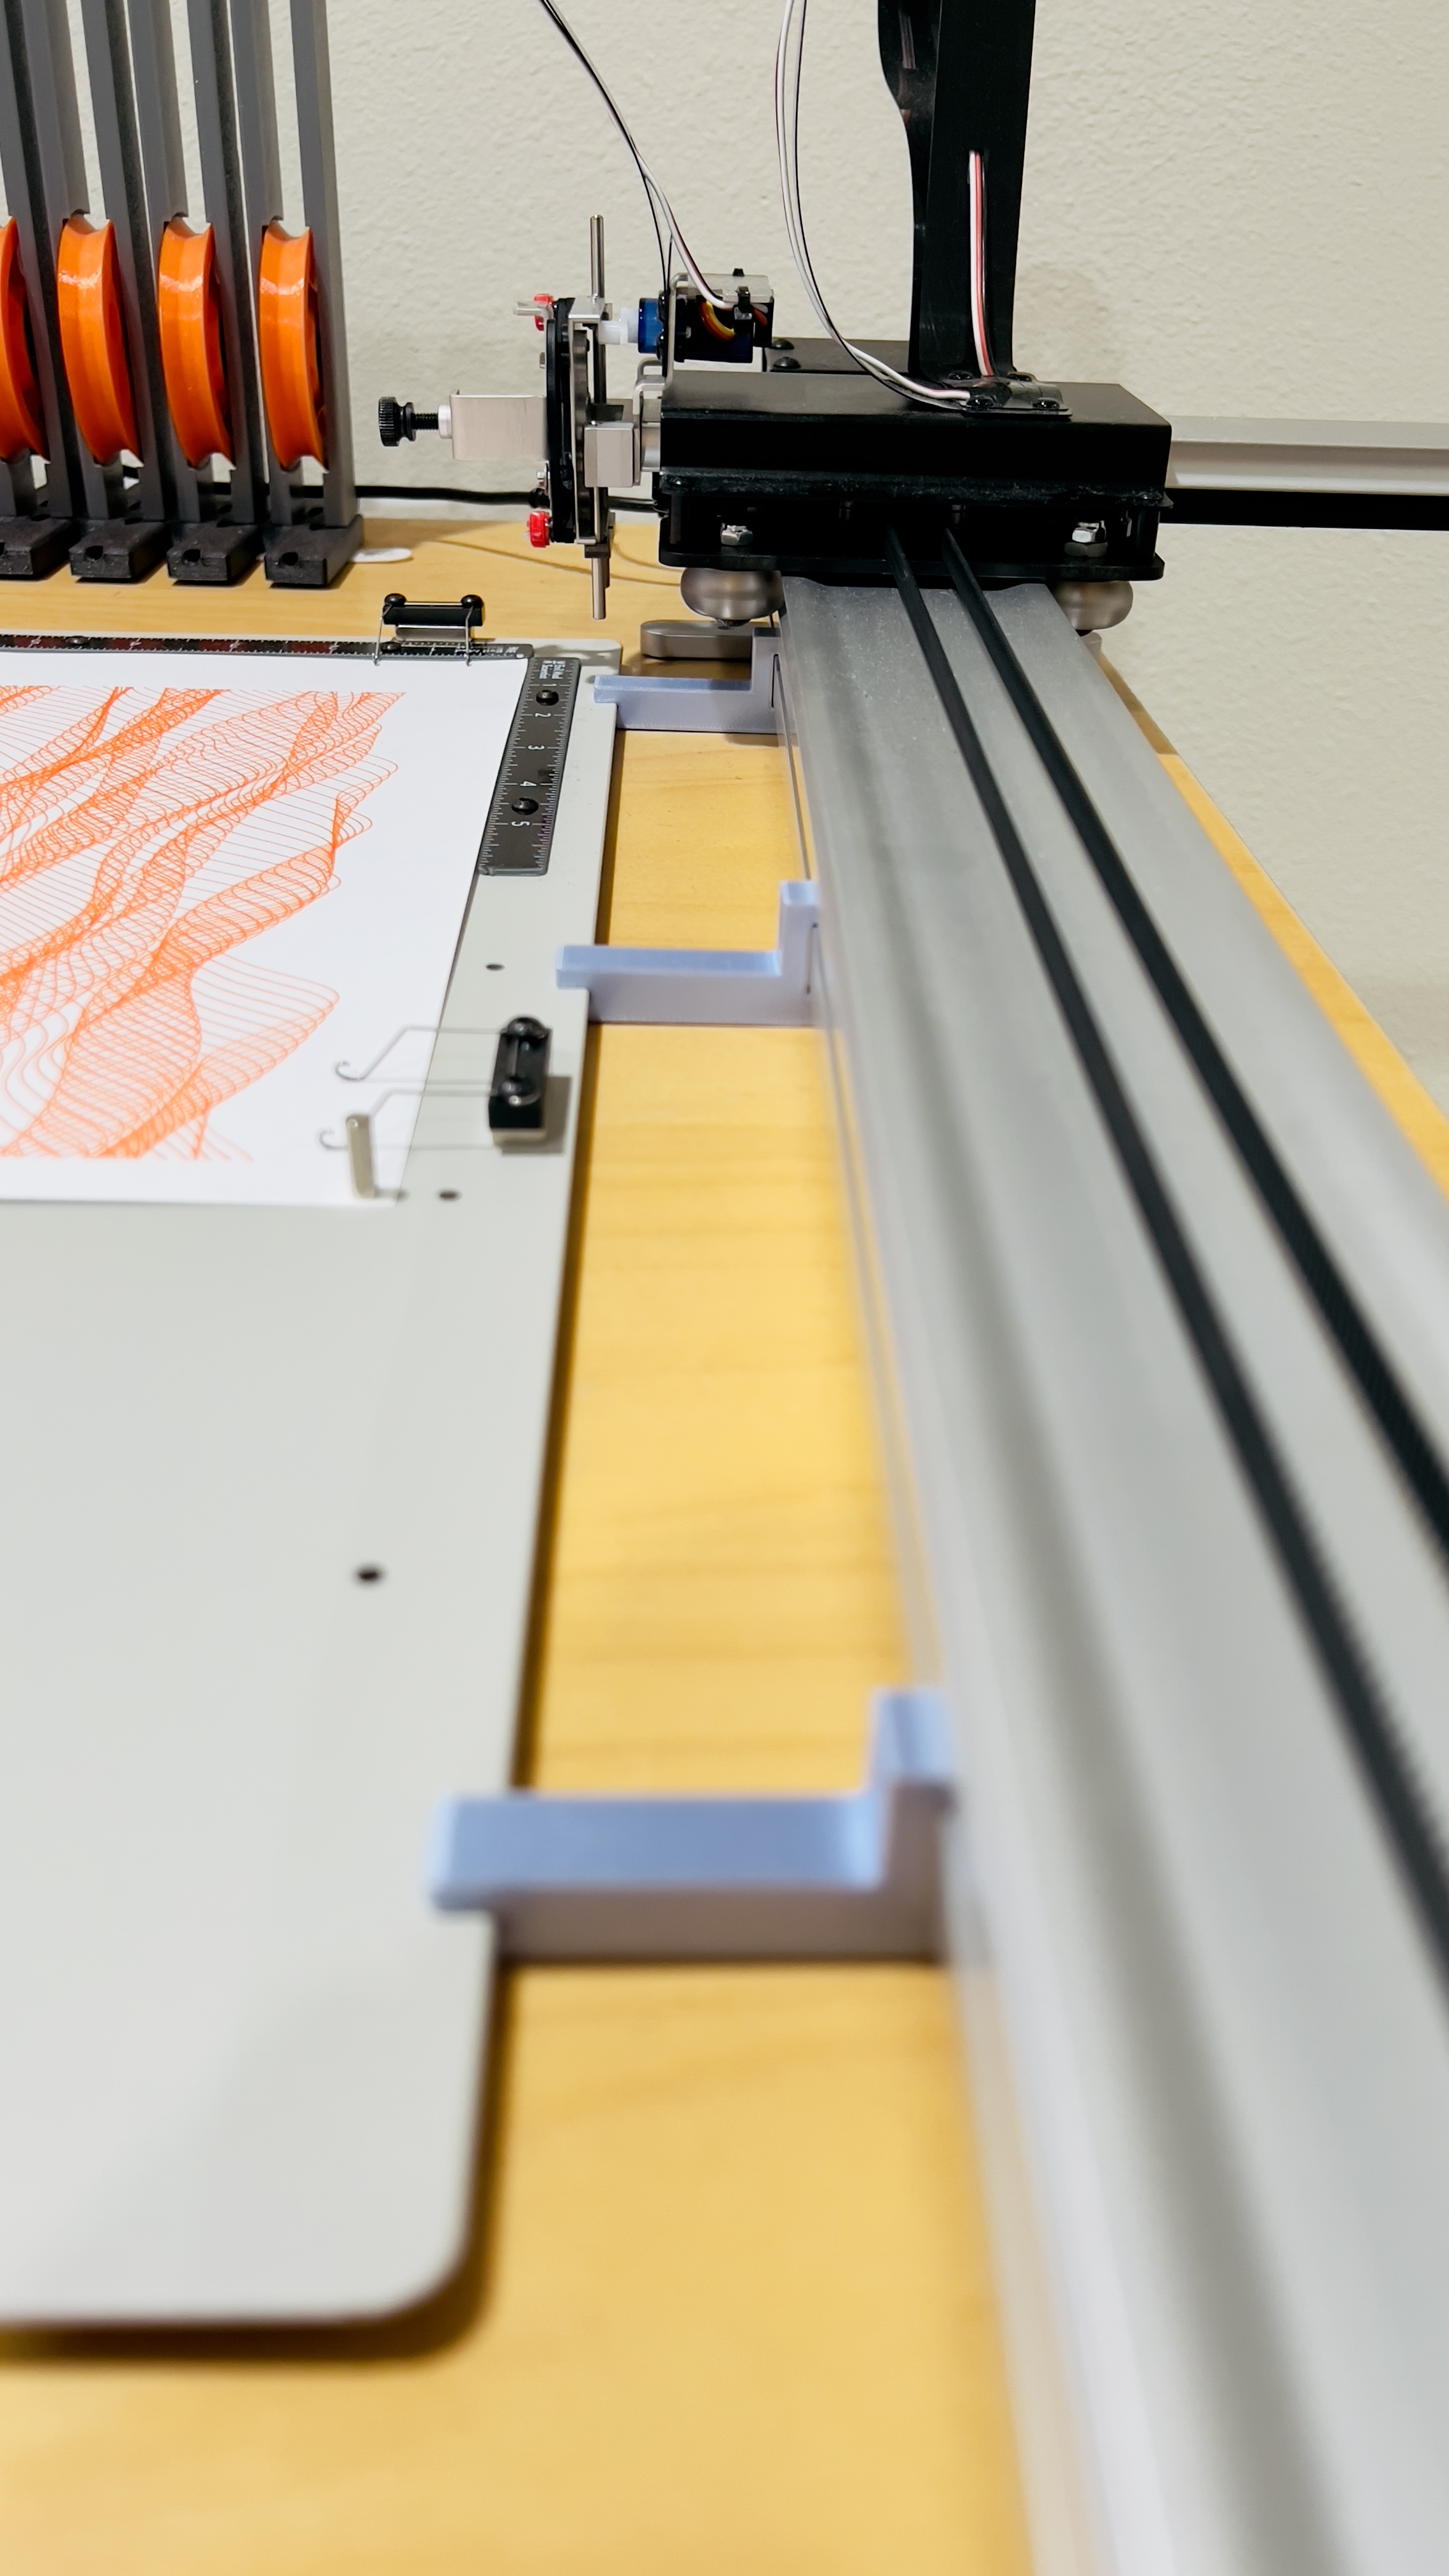
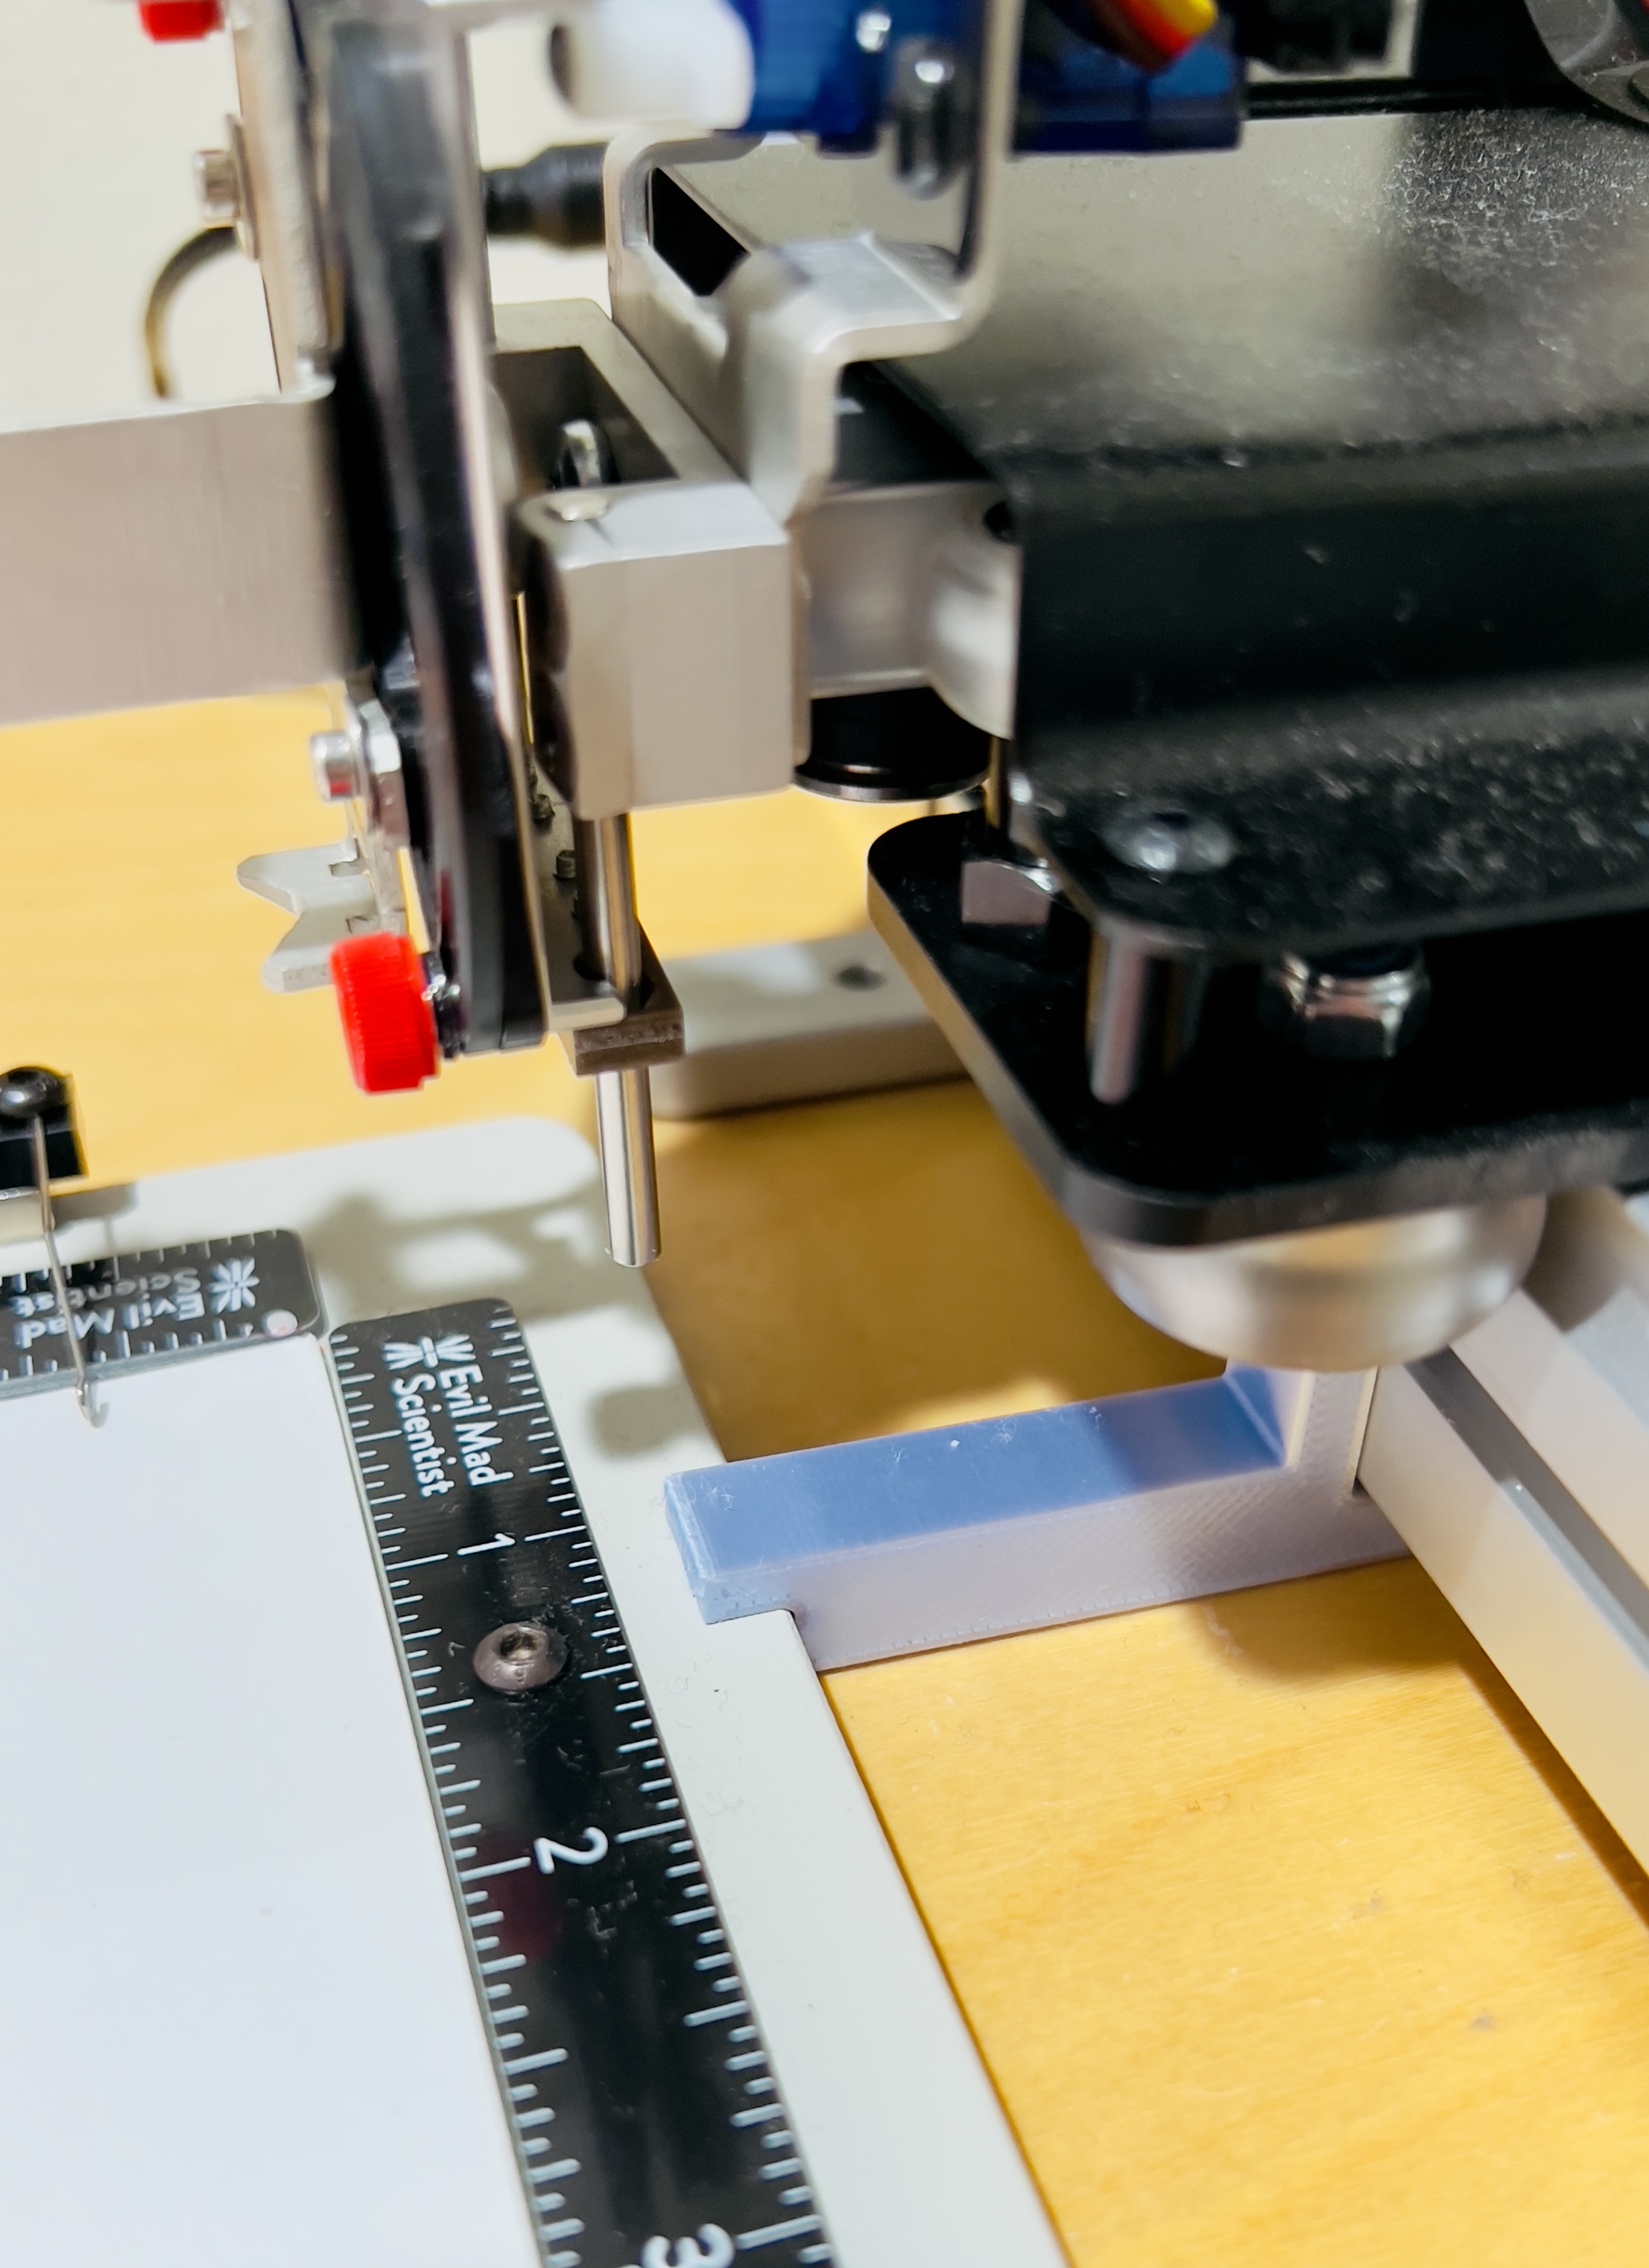
The Final Spacer Design
The image shows what the final Spacer looks like today.
Shot Details
- Date: April 05, 2022
- Aperture: 1.80
- Brightness: 15499/1681
- Exposure Time: 1/595
- F Number: 9/5
- Focal Length: 299253/190607
- ISO: 25
- Lens Model: iPhone 13 Pro Max back triple camera 1.57mm f/1.8
I printed the latest Design version that I am currently using on the Plotter in Silky Blue PLA. 15% Infill and no supports or brim. It took 45 minutes to print one. But I needed three of them. So, I printed one to ensure that everything fits just fines on the Plotter. And afterward, I printed two more to complete the setup.
Shot Details
- Date: April 05, 2022
- Aperture: 1.50
- Brightness: 51951/16508
- Exposure Time: 1/60
- F Number: 3/2
- Focal Length: 2988413/524283
- ISO: 80
- Lens Model: iPhone 13 Pro Max back triple camera 5.7mm f/1.5
Shot Details
- Date: April 05, 2022
- Aperture: 1.50
- Brightness: 71019/33380
- Exposure Time: 1/60
- F Number: 3/2
- Focal Length: 2988413/524283
- ISO: 200
- Lens Model: iPhone 13 Pro Max back triple camera 5.7mm f/1.5
Download
If you are interested in the source code of the design, the STL, or both, then head over to my github repo and download the files from there. You can print it for personal use. If you have suggestions to improve the design, feel free to create a PR, and I will happily review it.
The model is also available from Printables
Conclusion
The design phase was longer than I anticipated. Lack of practice and several rounds of trial and error contributed to that delay. But I learned a couple of things that will hopefully make my next design easier to realize. I like that I have a result that makes me happy and gives me a sense of accomplishment.
Something that I can see and use every time I use the Plotter for other projects. And if there is anything I want to adjust, I have the freedom to make those changes.
Thanks for reading. Happy designing, printing, and plotting.
#TIL #OpenSCAD #3DPrinting #Axidraw #Penplotter
comments powered by Disqus