TL;DR
A friend of mine asked me if I could build something useful with my 3D Printer. He wanted to have something to place his new (and expensive) tamper for ground coffee. I always wanted to design and print something useful on my 3D Printer. And I wanted to learn and use OpenSCAD for a long time. Now I had an excellent reason to learn it.
Create the Design
I had no experience with OpenSCAD at all when I started this little project. OpenSCAD comes with a lot of examples and a short Cheat Sheet that is extremely helpful in learning OpenSCAD.
OpenSCAD uses a simple programming language to describe geometric shapes. These shapes can be modified by having functions to create them with variable parameters. That makes it easy to modify a design by changing a parameter, and everything that depends on that parameter will adjust accordingly. This parametric design principle is partly used by some professional-grade CAD programs (Fusion360, AutoCAD). It’s not a new thing. OpenSCAD has a much lower bar, IMHO, to create a parametric design.
Design Considerations
I wanted to keep it simple for the first project. I envisioned a square that is big enough to hold the tool, a circle/cylinder on top of that square, to fit around the circular metal base of the tool tightly. The bottom should not be too big since it will be used in an environment with limited surface space. But it should not be too small to avoid falling over. So far, this sounds doable.
The challenges I encountered along the way
- How do I create a hollow cylinder with a specific wall width?
- How can I create rounded corners for the square base?
- How can I add some text on top of the base (give it a personal note)?
- How can I add some text embossed on the side of the Base (copyright text)?
Let’s look at the implementation.
Creating the Square Base
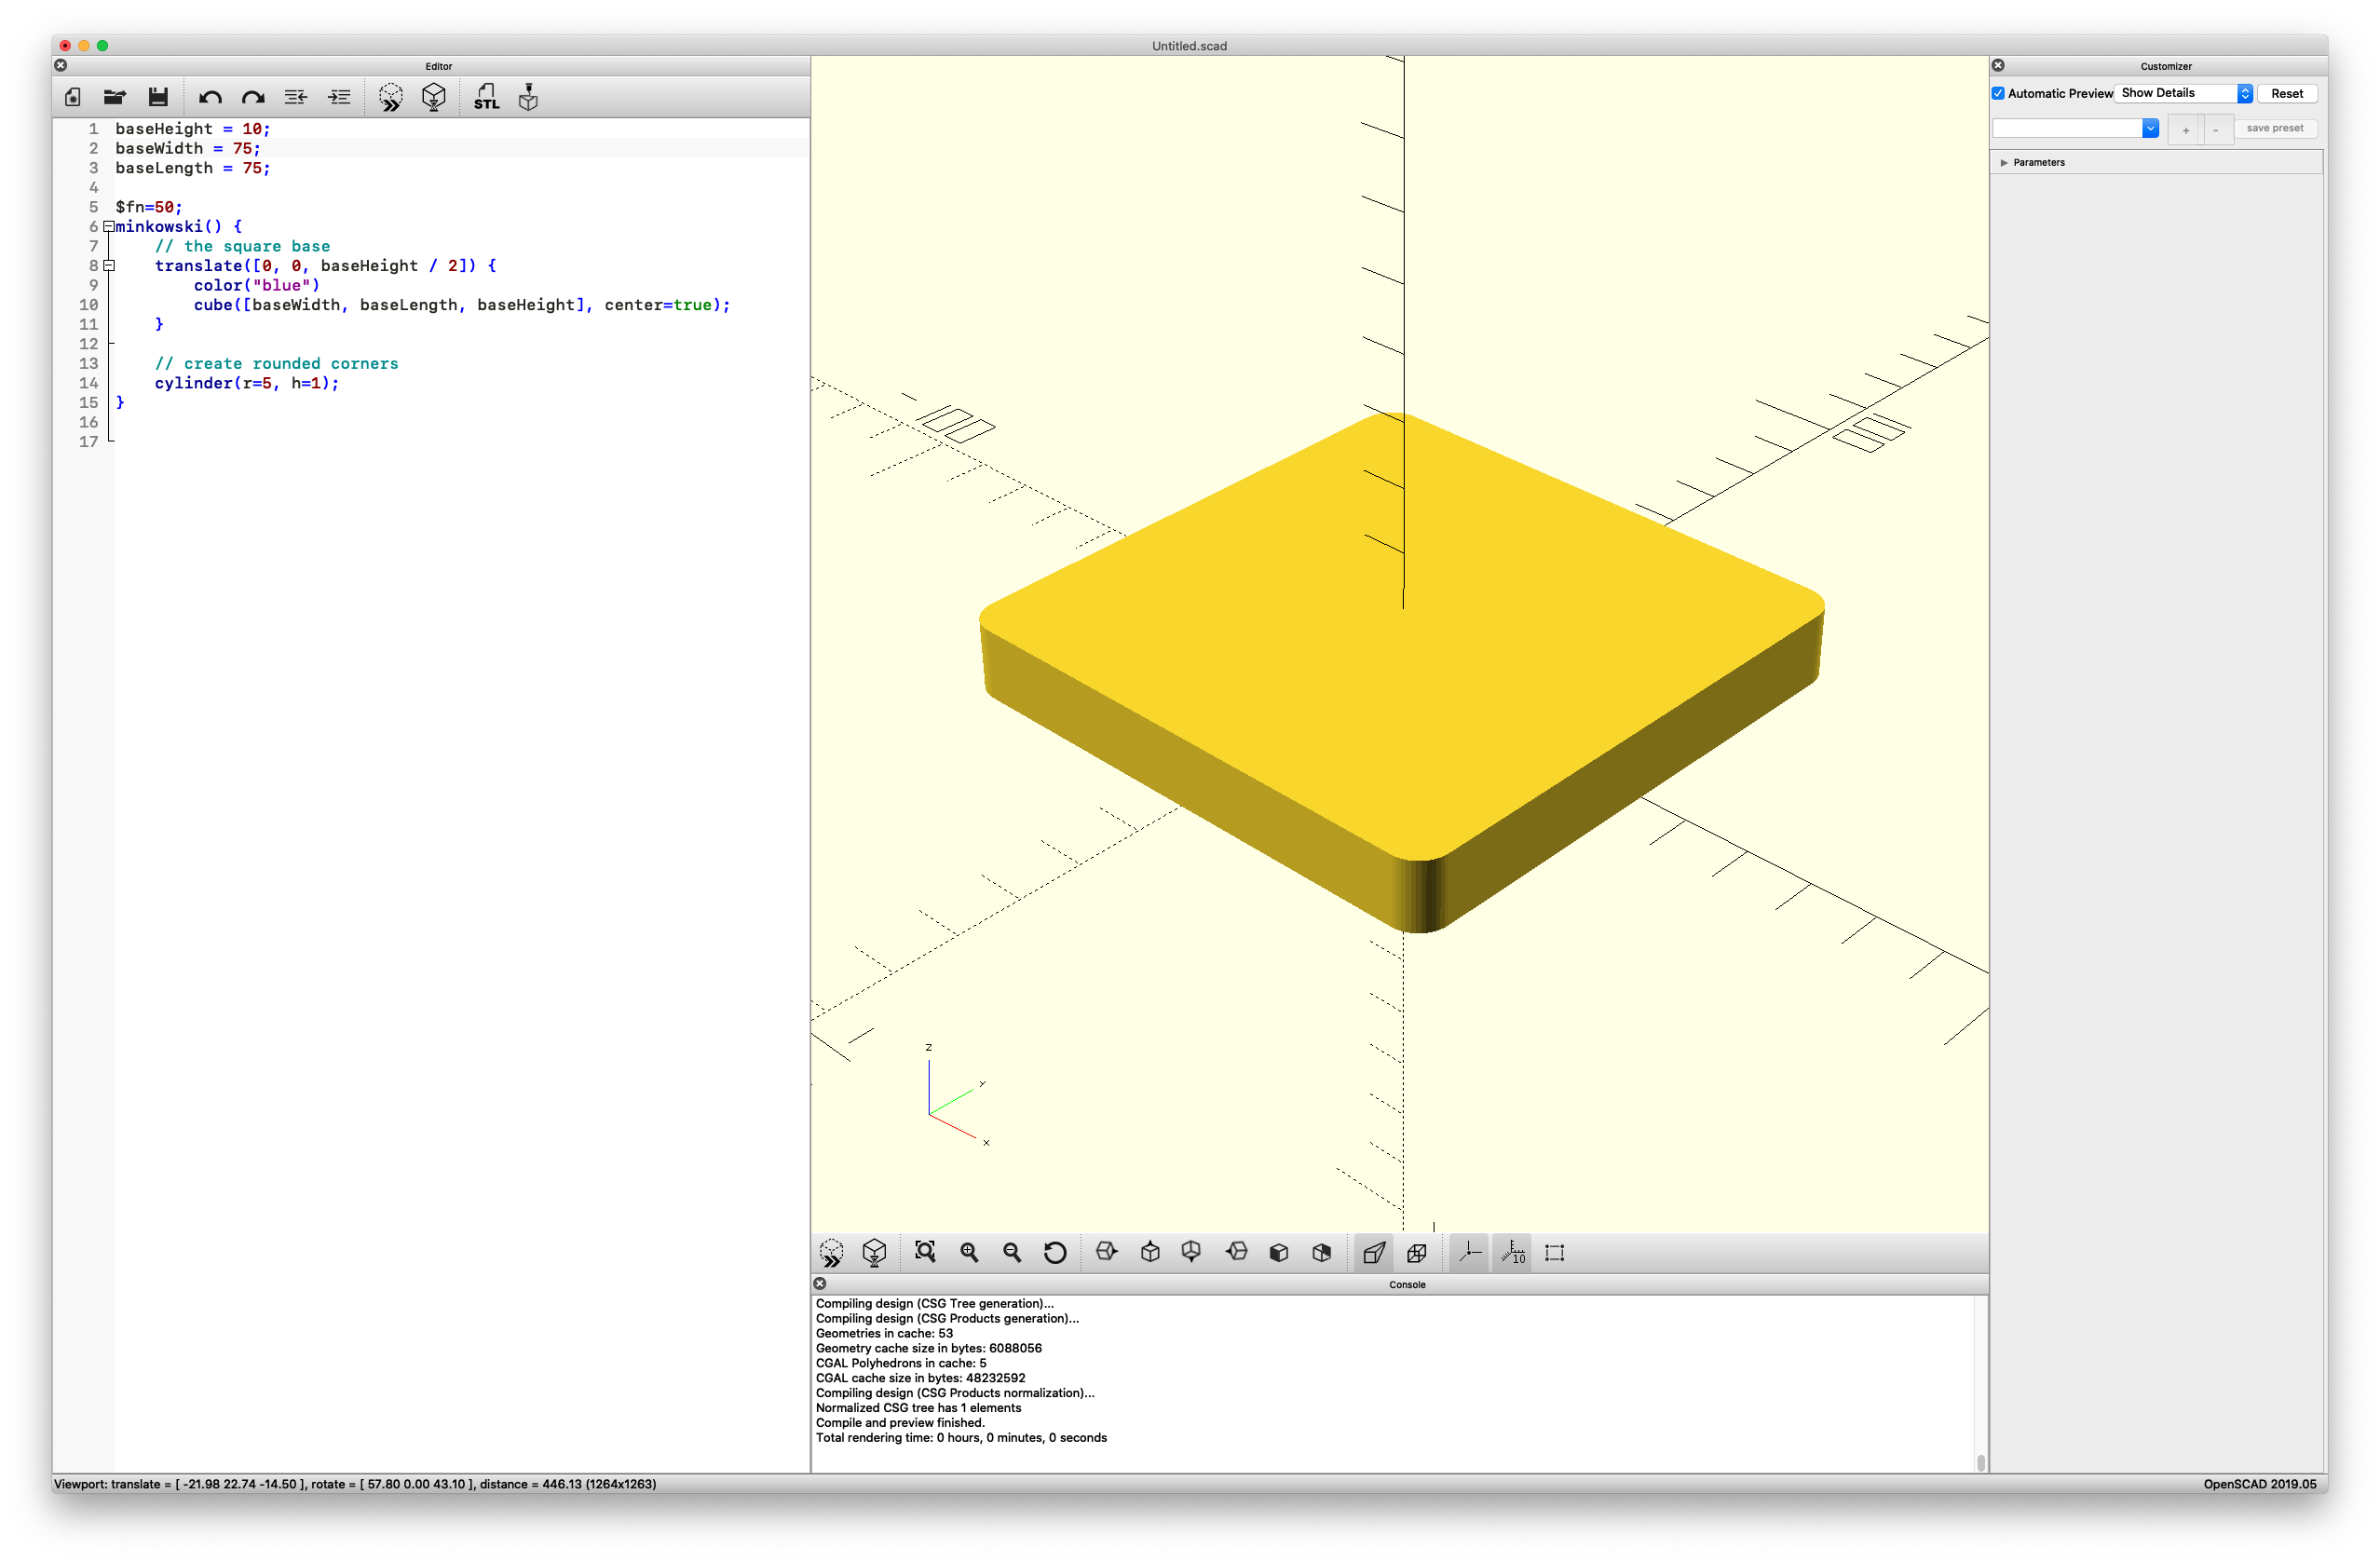
 1module RoundedCornerSquareBase() {
 2    minkowski() {
 3        // the square base
 4        translate([0, 0, baseHeight / 2]) {
 5            color("blue")
 6            cube([baseWidth, baseLength, baseHeight], center=true);
 7        }
 8
 9        // create rounded corners
10        cylinder(r=5, h=1);
11    }
12}
Create a module (like a function) and create the base square with cube and center it around all the axes. Use translate to move the square up the z-axis, so that the bottom of the square is not in the negative x and y coordinate space.
The tricky part for me was to figure out how to have rounded corners for the square. OpenSCAD provides the transformation function minkowski that will sum up multiple shapes into one shape. More details are available here.
minkowski takes the cube and the cylinder from the code above and sums them up into a square with rounded corners. This sum increases the width and height of the square by the radius of the cylinder.
Shot Details
Add the Hollow Cylinder
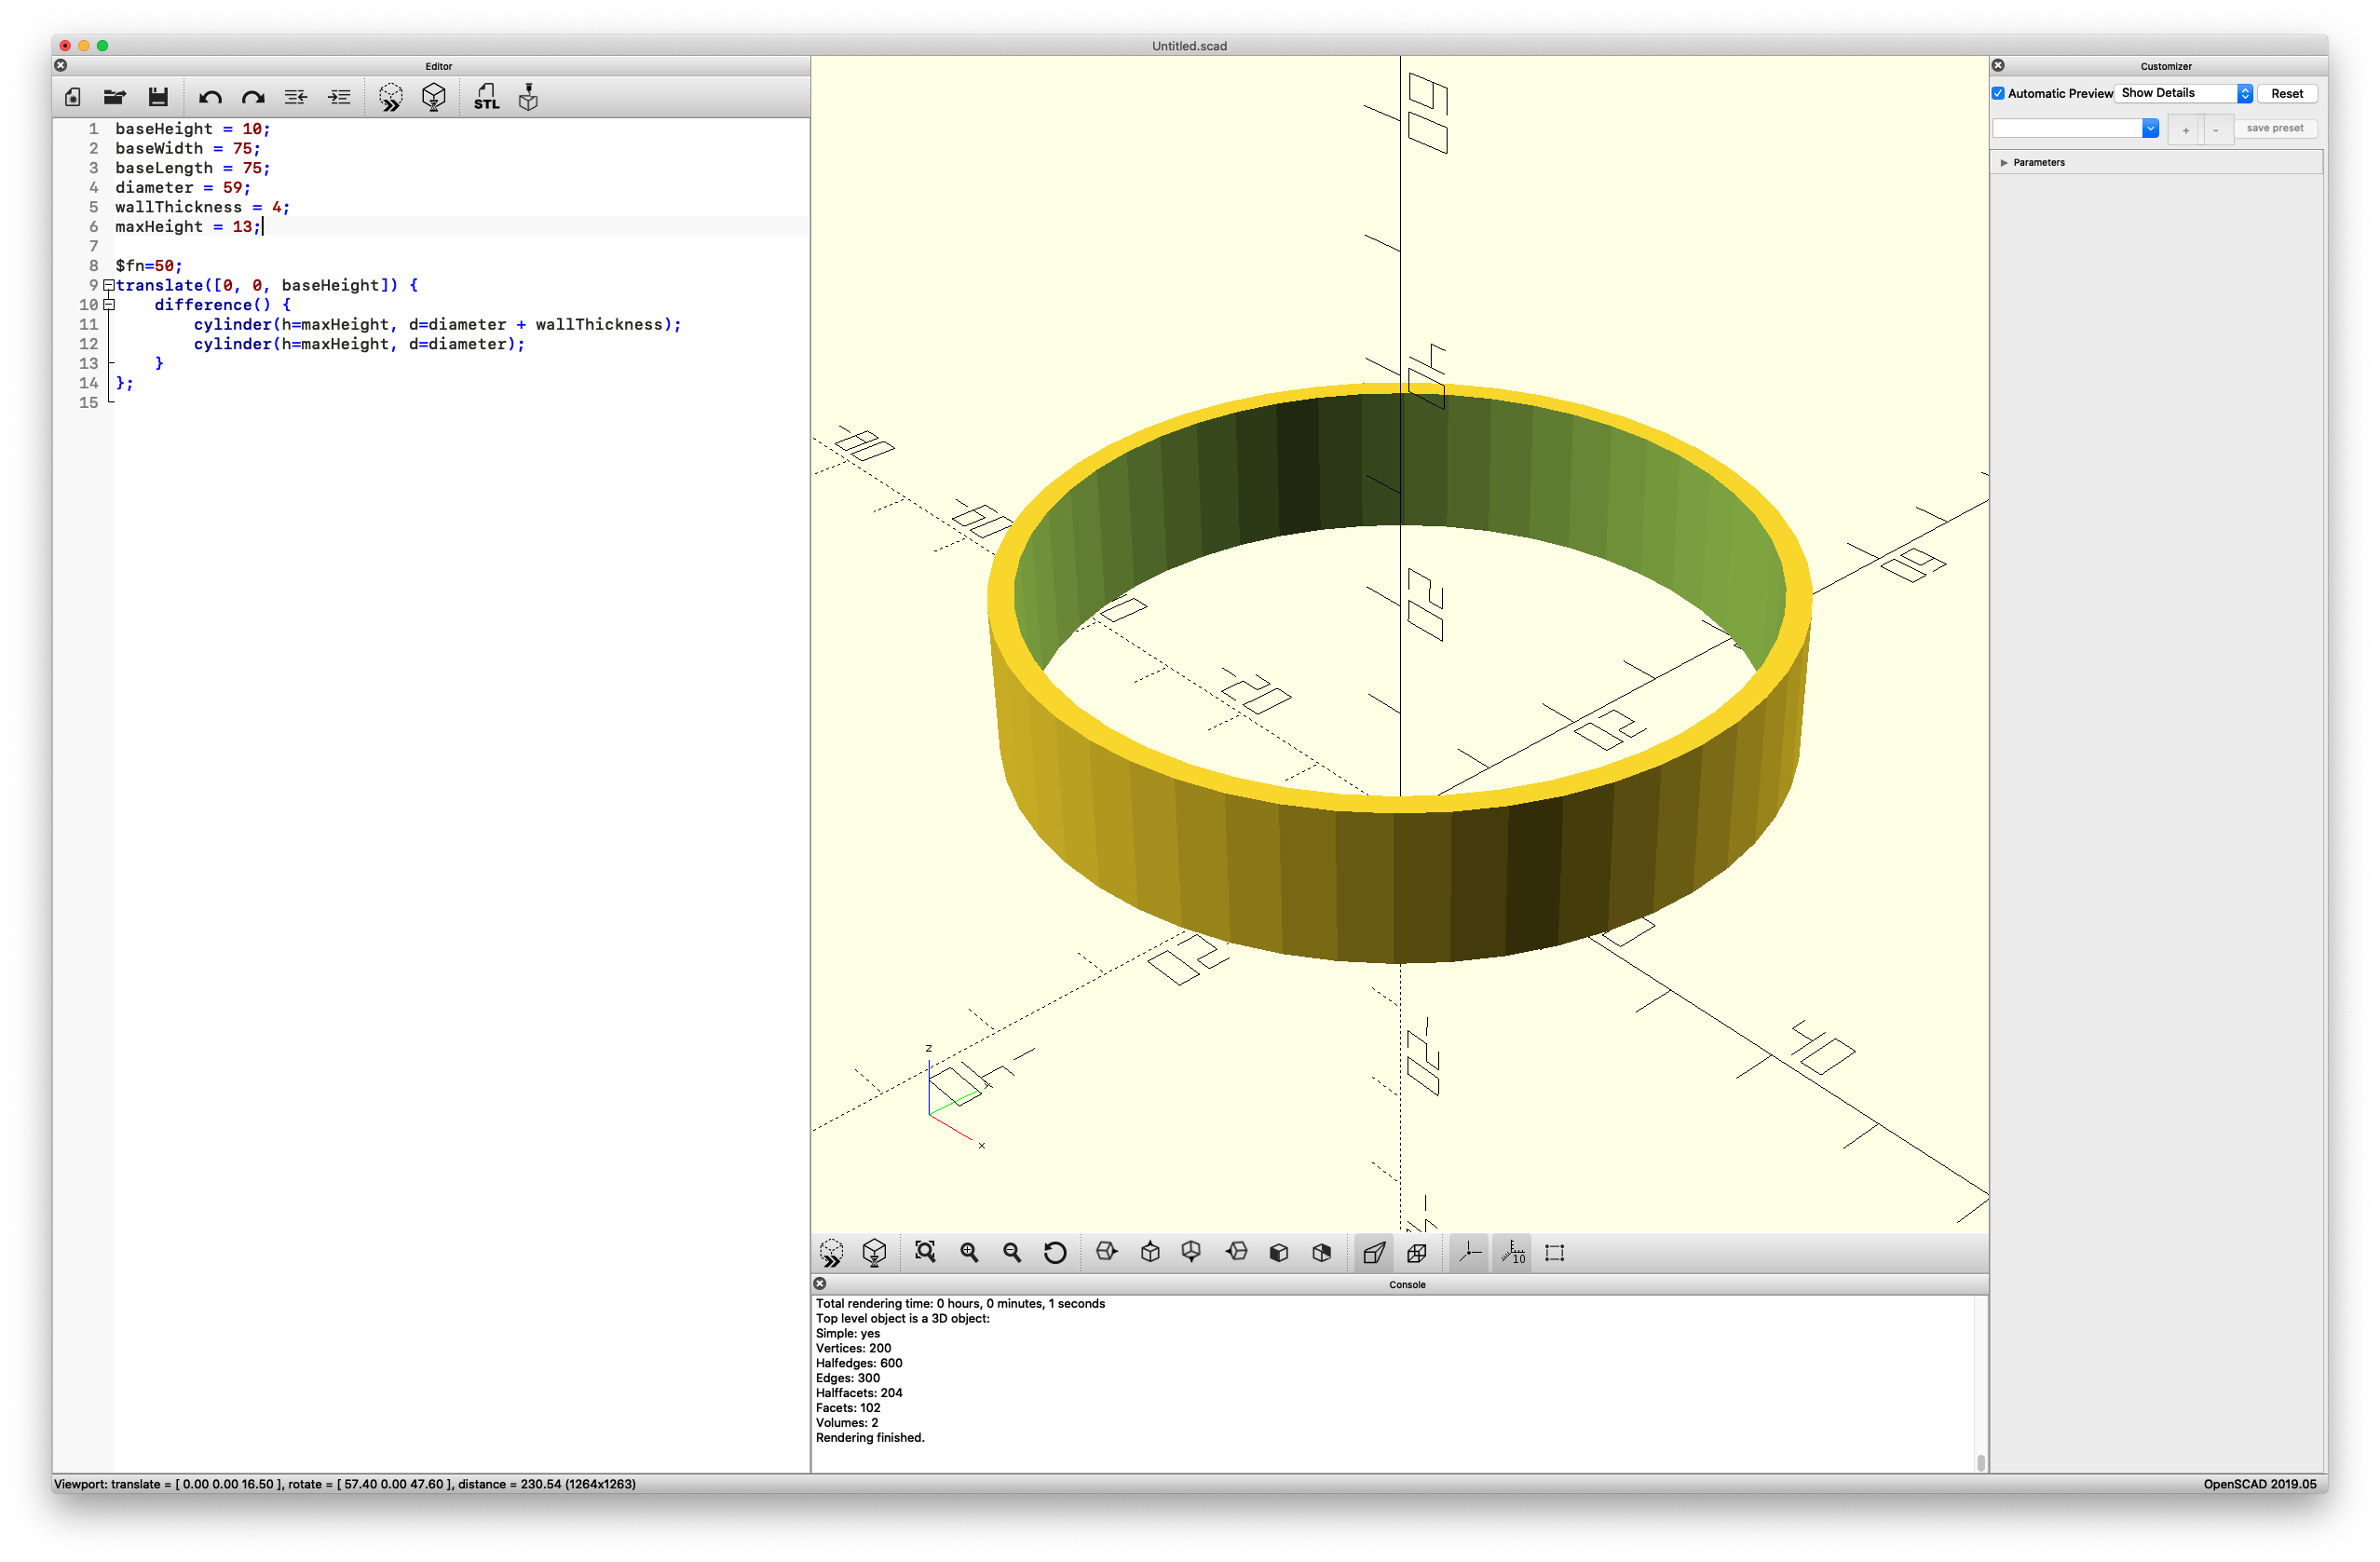
1module HollowCylinder() {
2    translate([0, 0, baseHeight]) {
3        difference() {
4            cylinder(h=maxHeight, d=diameter + wallThickness);
5            cylinder(h=maxHeight, d=diameter);
6        }
7    };
8}
The solution was not too difficult after I found the difference function. Take two cylinders with different diameters and place them in the same position and let the difference function figure it out.
Shot Details
Add the Text on top of the Base
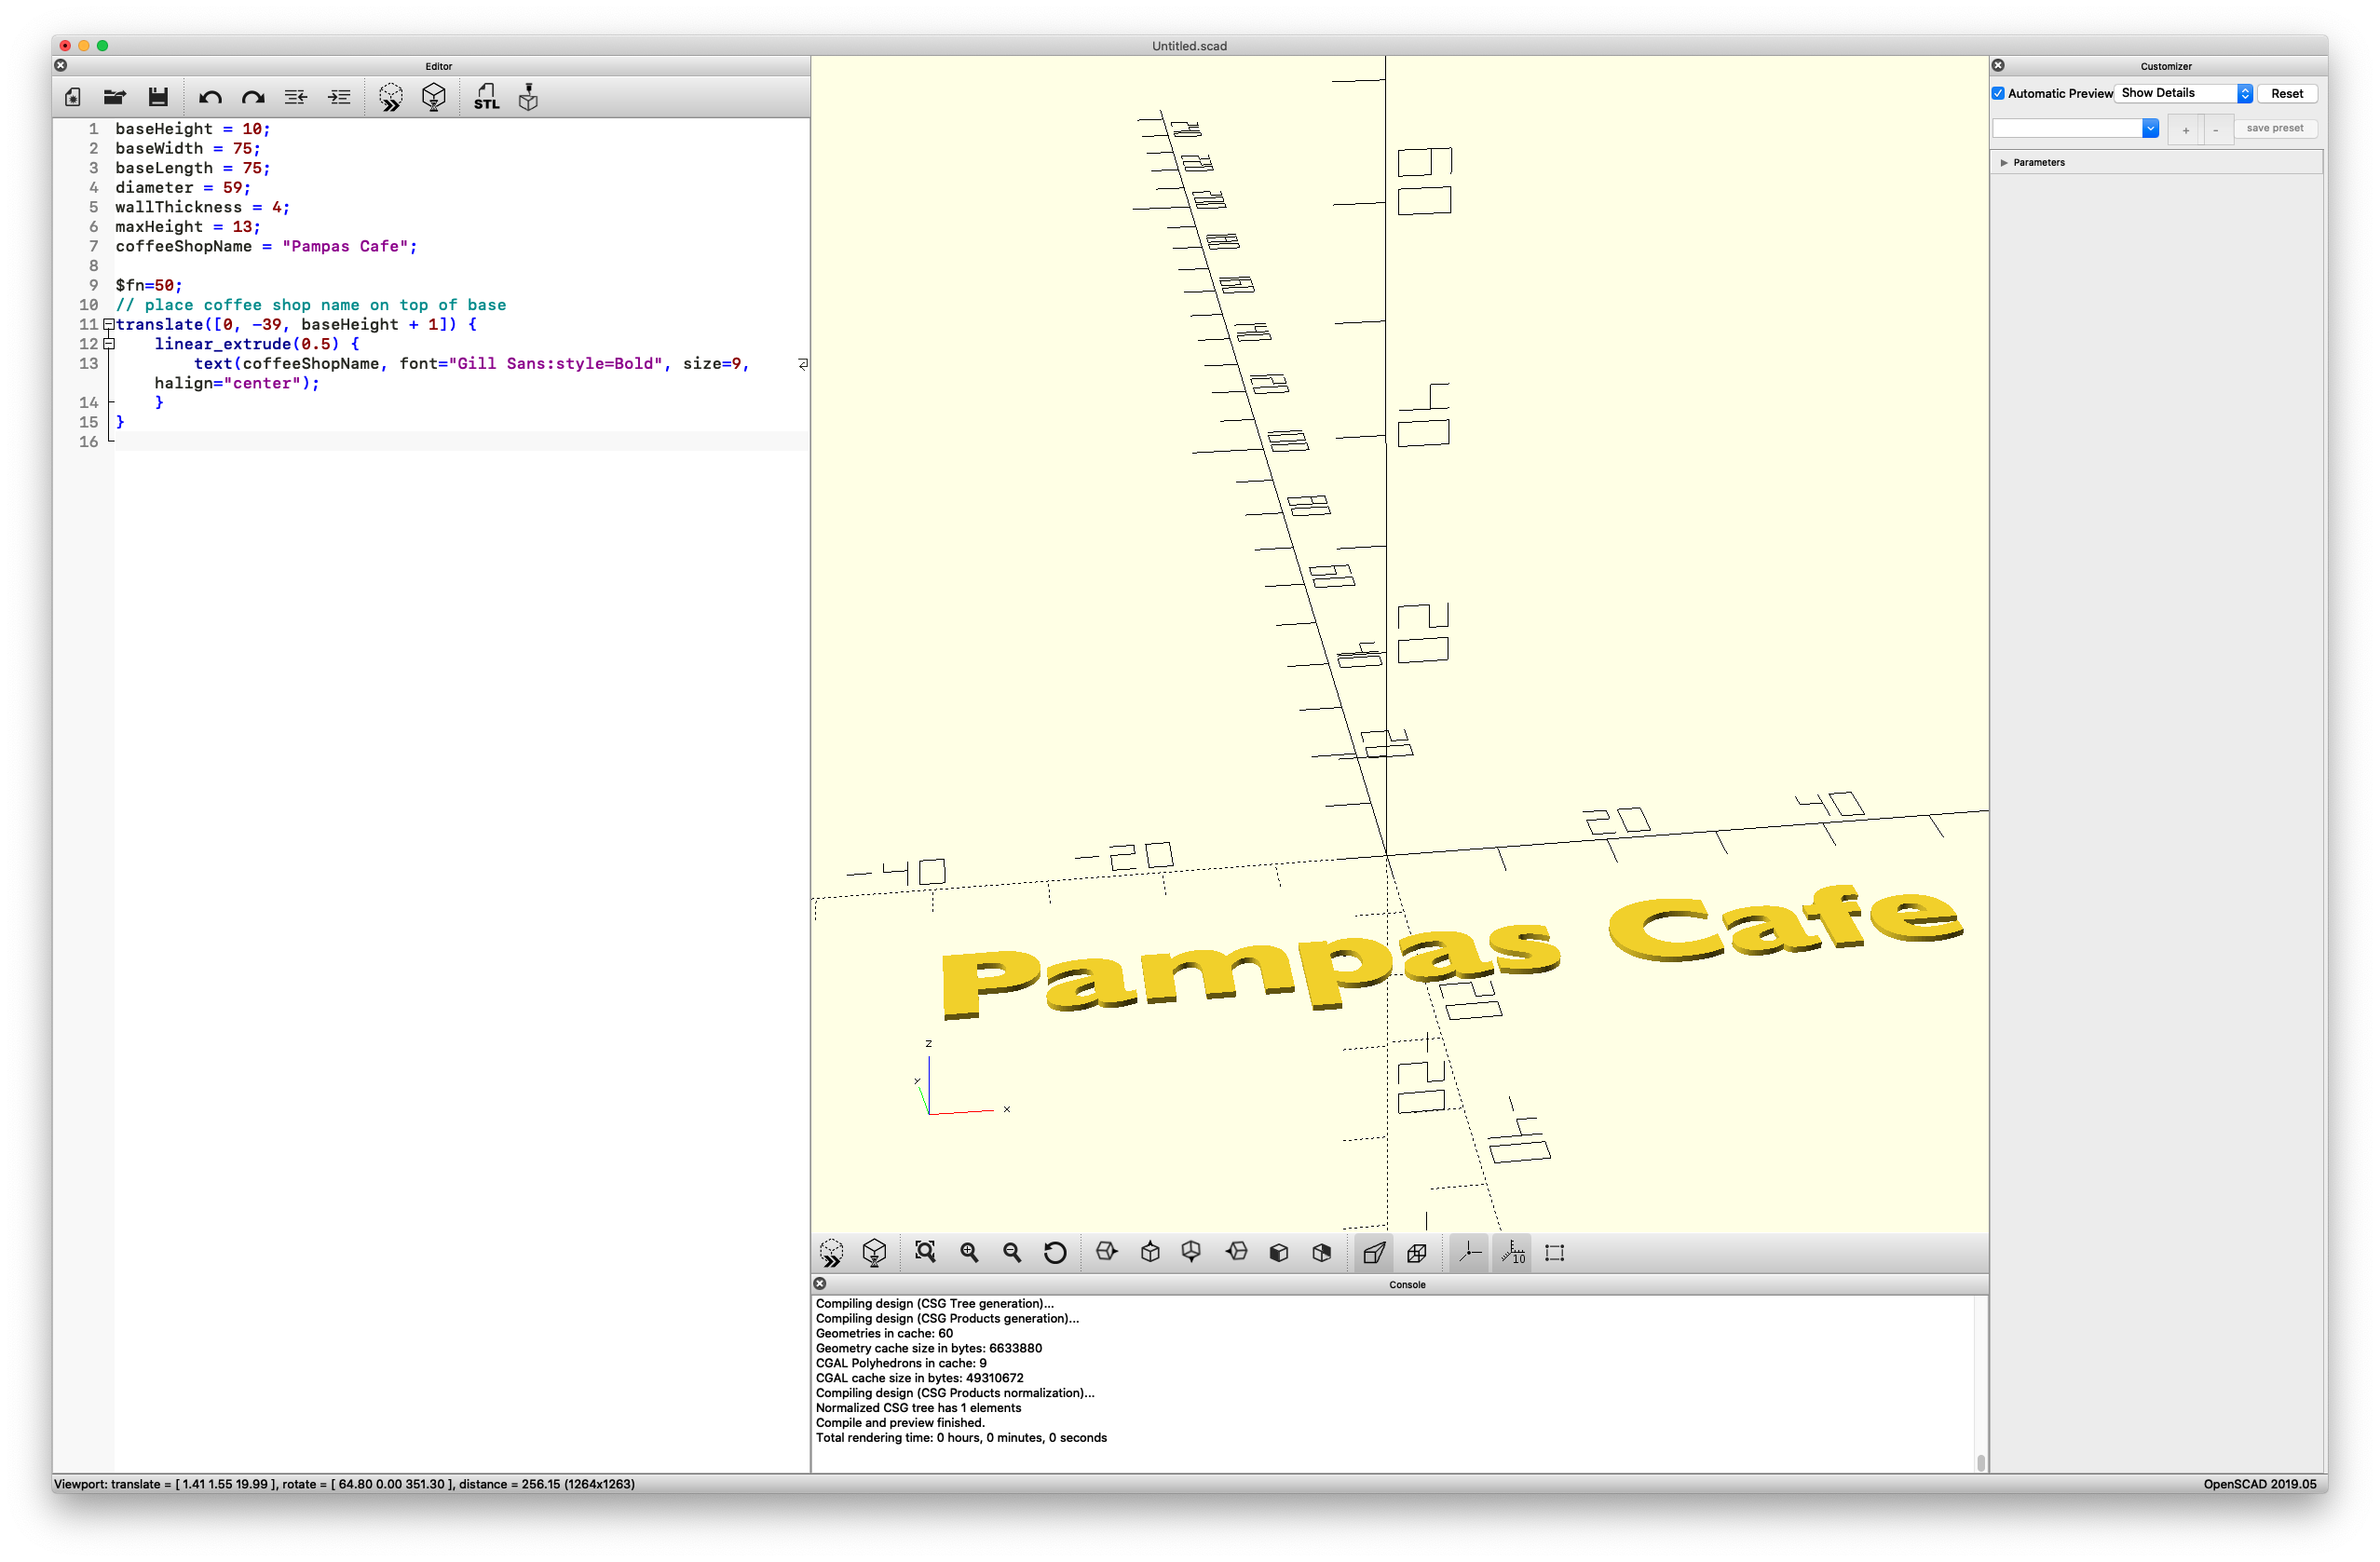
1module CoffeeShopName() {
2    // place coffee shop name on top of base
3    translate([0, -39, baseHeight + 1]) {
4        linear_extrude(0.5) {
5            text(coffeeShopName, font="Gill Sans:style=Bold", size=9, halign="center");
6        }
7    }
8}
Placing the text was a bit of trial and error to find the correct position on top of the base square. Then I encountered the issue that the text height wasn’t enough to stick out a bit from the surface. After inspecting examples and searching the internet, I found that linear_extrude function that can be used to make something flat grow in height.
Shot Details
Add the debossed Text on the side of the Base
1module RoundedCornerSquareBase() {
2 minkowski() {
3 // the square base
4 translate([0, 0, baseHeight / 2]) {
5 color("blue")
6 cube([baseWidth, baseLength, baseHeight], center=true);
7 }
8
9 // create rounded corners
10 cylinder(r=5, h=1);
11 }
12}
13
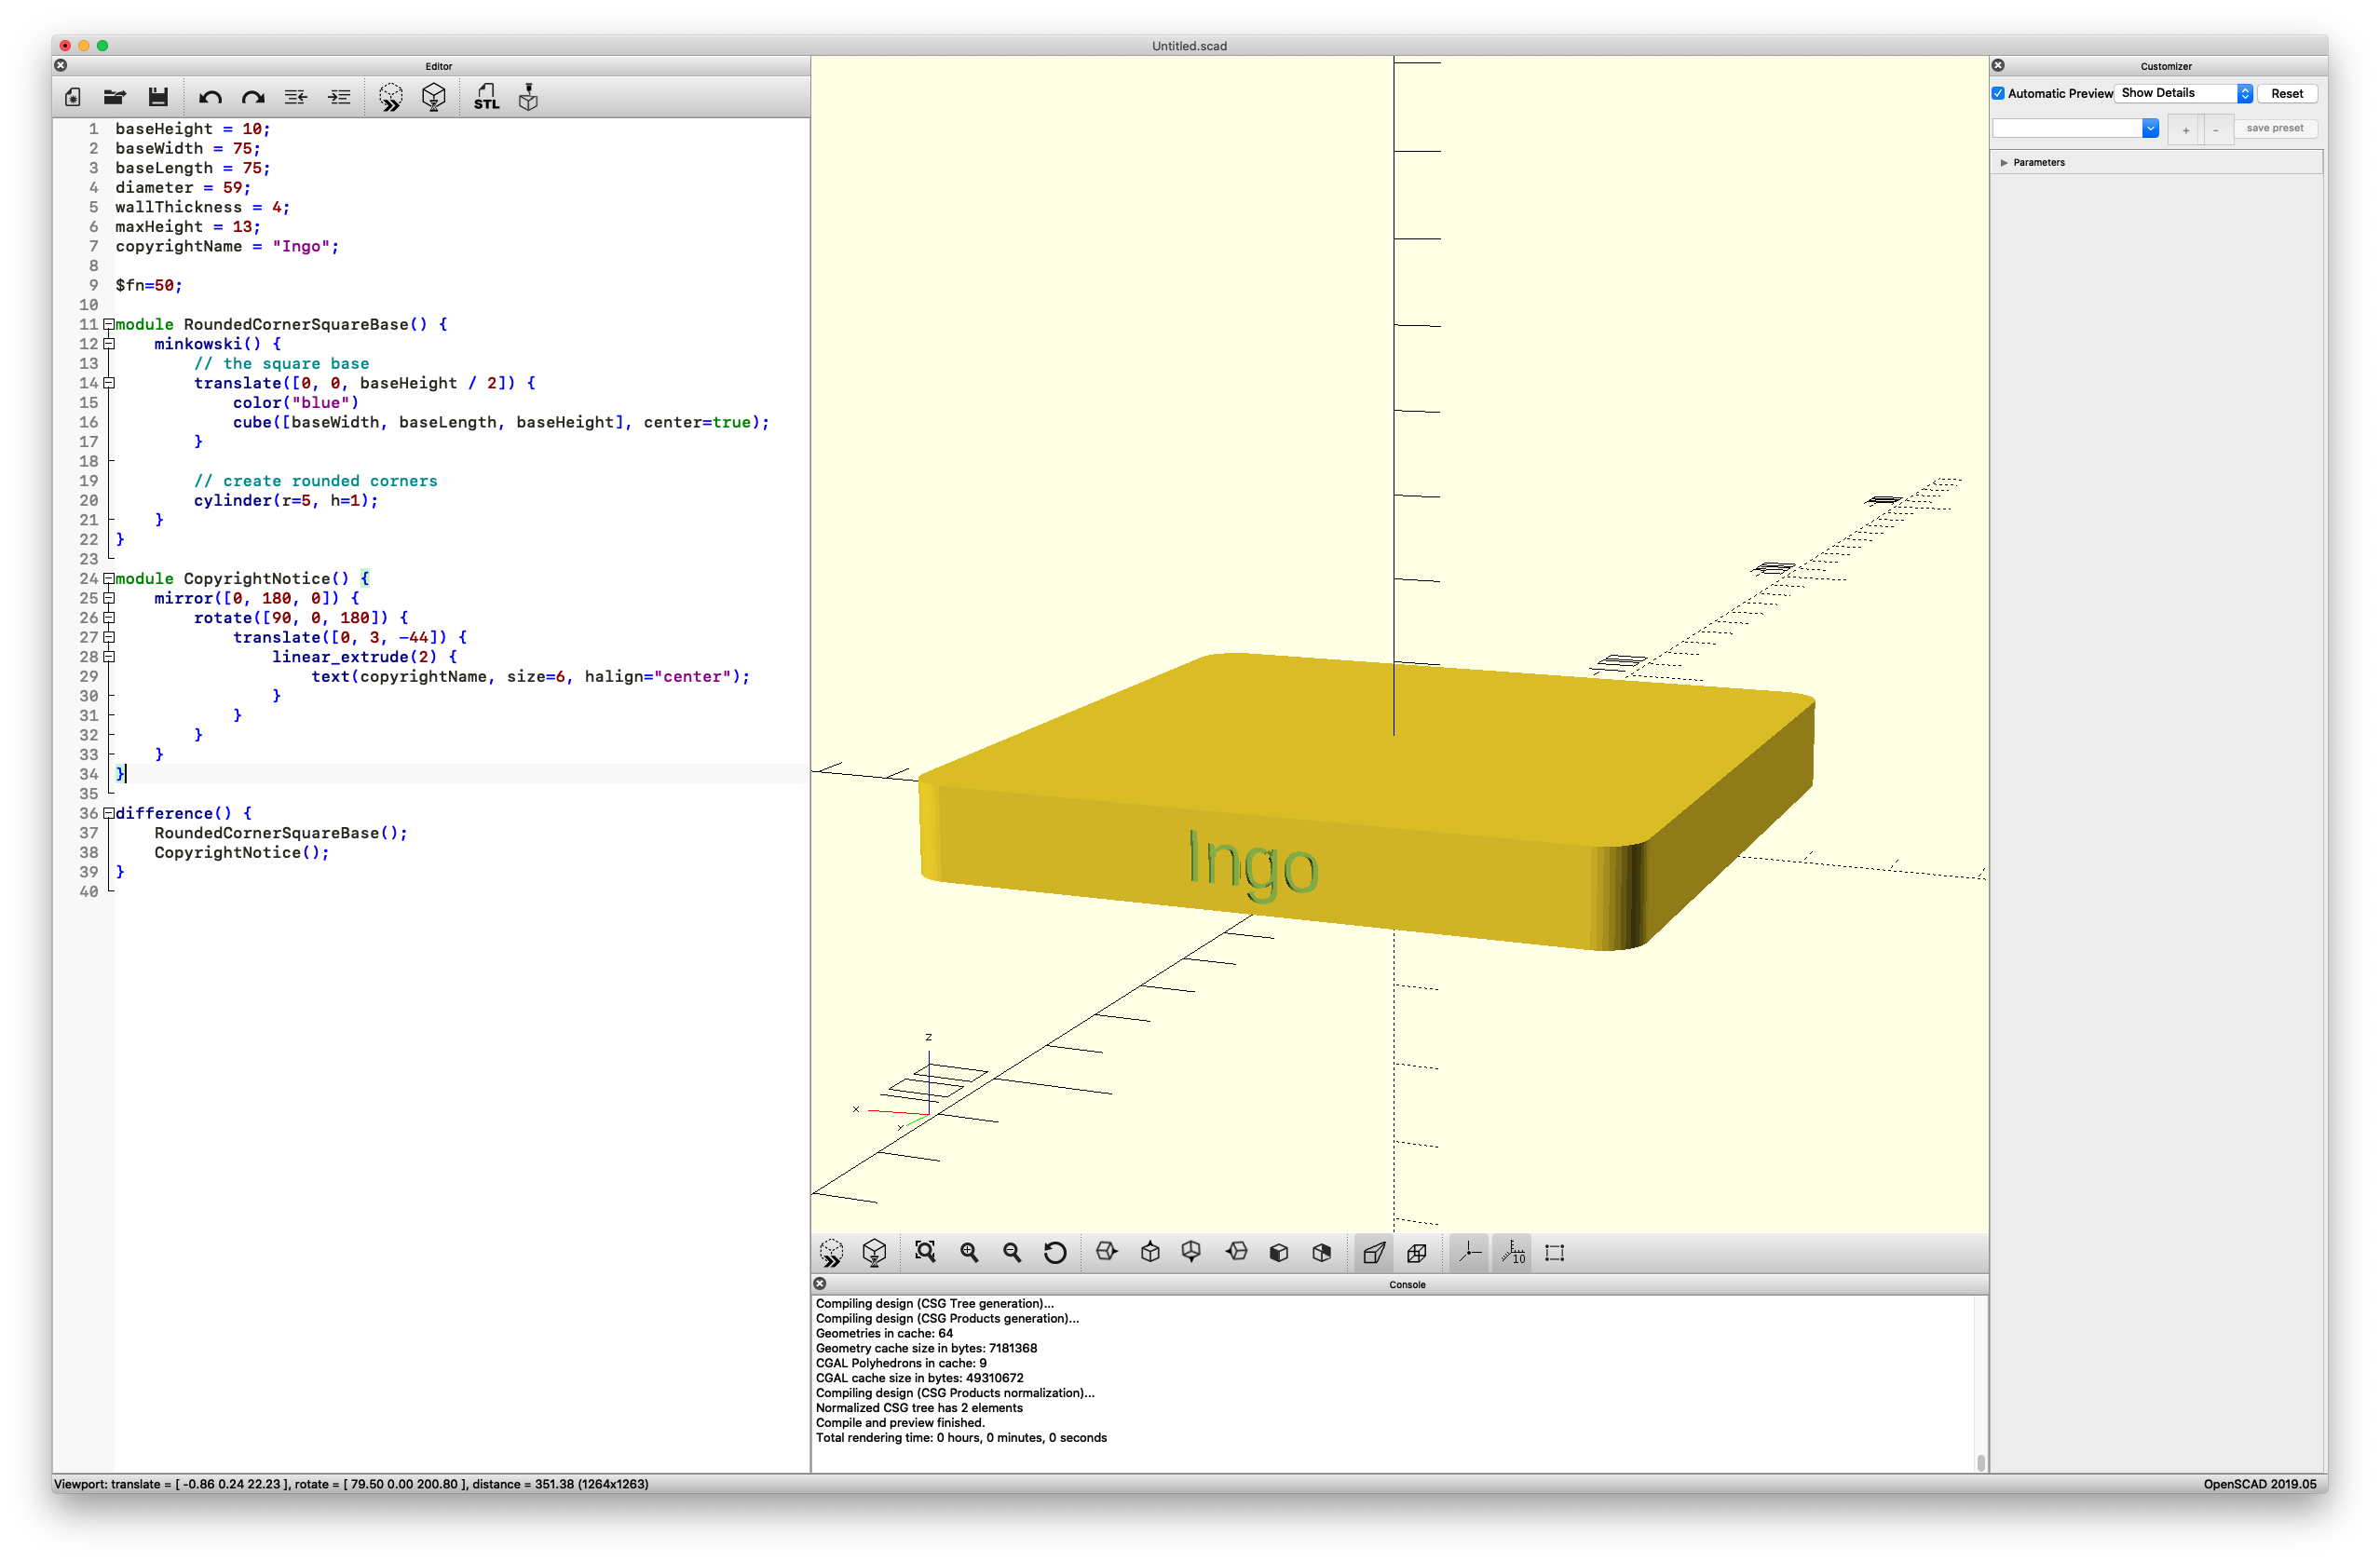
14module CopyrightNotice() {
15 mirror([0, 180, 0]) {
16 rotate([90, 0, 180]) {
17 translate([0, 3, -44]) {
18 linear_extrude(2) {
19 text(copyrightName, size=6, halign="center");
20 }
21 }
22 }
23 }
24}
25
26difference() {
27 RoundedCornerSquareBase();
28 CopyrightNotice();
29}This text placed on the side of the square base took the most time for me to implement. I had come up with this solution that combines mirror, rotate, translate, and linear_extrude to create a simple text on the side of the base. I didn’t want this text to sit on top of the surface. So, I had to trial and error my way to find the correct placement.
Once I had the correct position, I used the difference function to get the text debossed into the square base.
It was worth it in the end, and I was happy with the result.
Shot Details
The Result
The combination of all the code snippets looks like this.
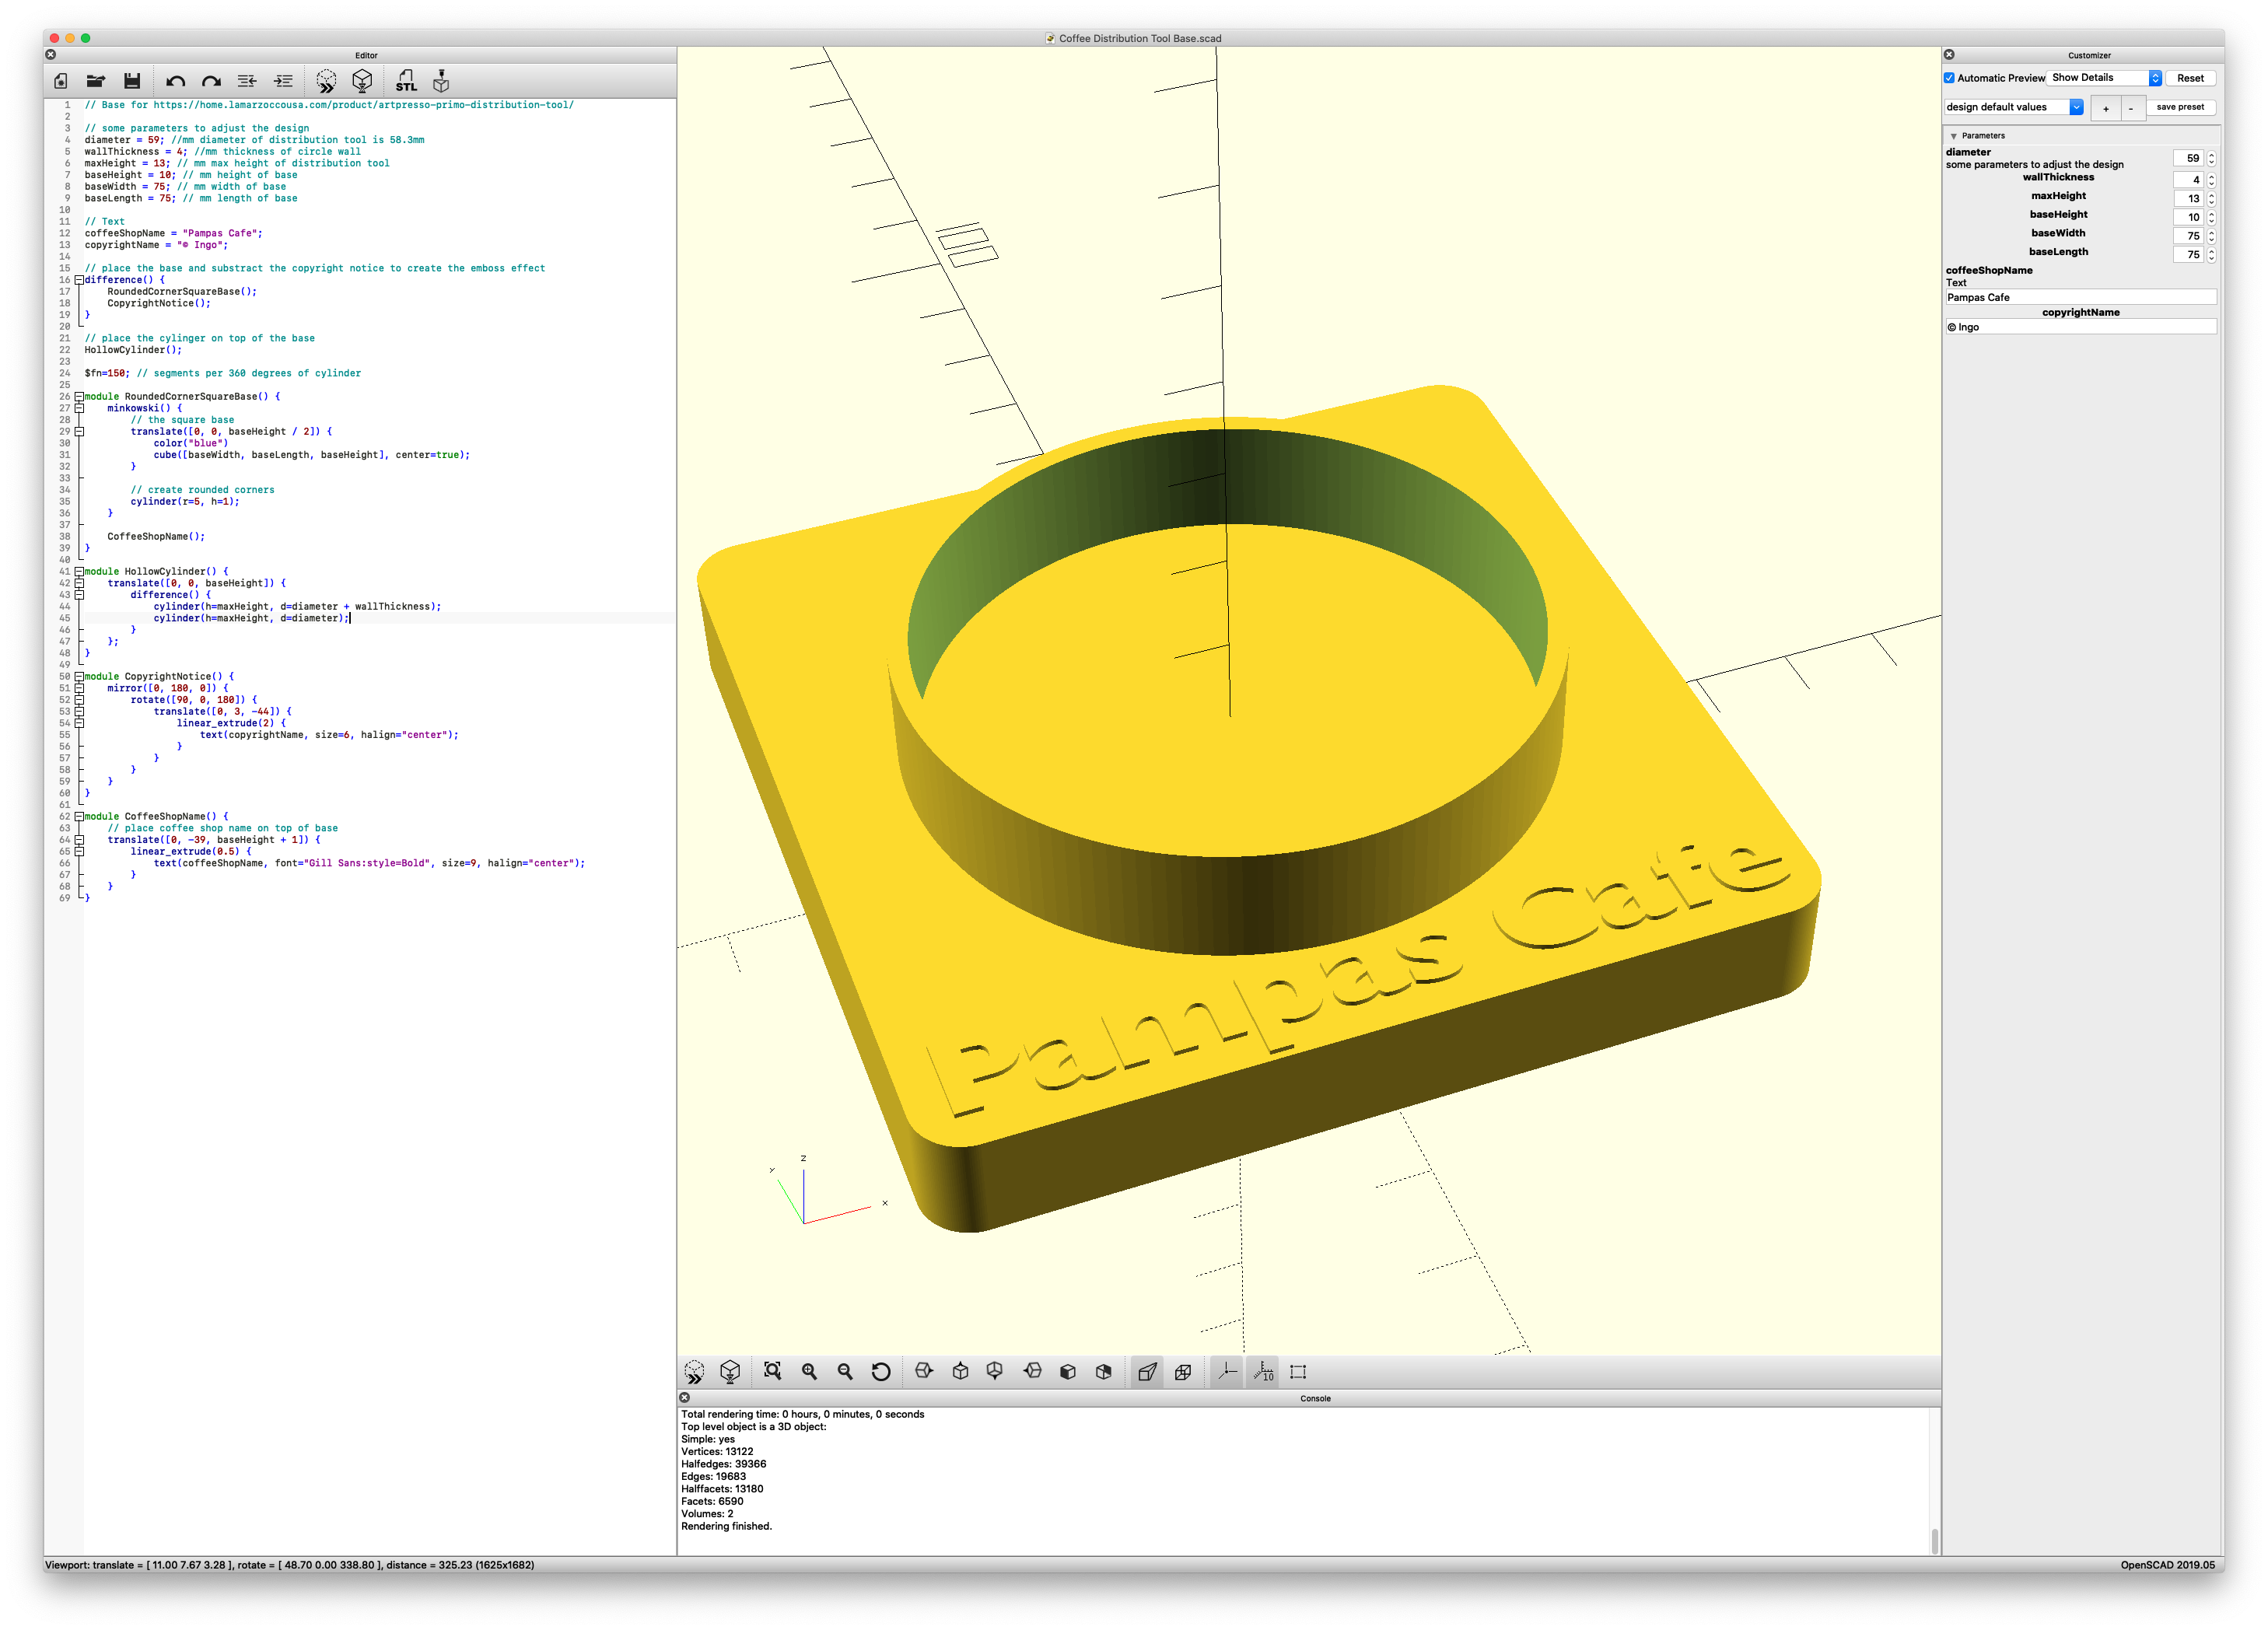
Shot Details
OpenSCAD Project Files
The project Files are located in my github repository
Print Settings
I printed the base on my Prusa i3 MKS2 with MMU2 with PETG Filament from Atomic Filament. I used PrusaSlicer 2.2.1 to slice the model with 20% Infill and no support on the smooth metal sheet.
Summary
It was fun to learn a different way to create 3D models. It takes some time to do certain things, like the copyright text. OpenSCAD is a powerful tool to program your 3D models. There are a lot of great examples that come with OpenSCAD, and I recommend inspecting them to learn how to realize specific effects. Since you have a programming language with control structures, loops, and functions, there are endless possibilities to create compelling models that would be otherwise difficult to realize (look at module_recursion.scad).
If you find it useful or if you have questions, leave a comment and share this post. If you have any feedback for the design, clone the repo, then file an issue or submit a pull request.
Mahalo 🌸
#Programming #OpenSCAD #3D Design
comments powered by Disqus